If you’ve ever wondered how to cut garage door cable, you’ve come to the right place. Cutting a garage door cable isn’t something most homeowners think about until the cable shows signs of wear or breaks. Understanding how to carry out this task safely and efficiently can save you time, money, and the hassle of dealing with a malfunctioning garage door.
Whether you’re delighted by the chance to tackle a new DIY project or you’re simply looking to get the job done, this comprehensive guide will walk you through each step. Here, we provide a thorough look at the process, covering everything from the reasons why you might need to cut the cable to detailed, step-by-step instructions on how to go about it.

Why You Might Need to Cut a Garage Door Cable
There are a variety of reasons why you might need to cut a garage door cable. The most common reasons include:
1. Cable Wear and Tear
Over time, garage door cables can show signs of wear and tear. This may be due to rust, fraying, or simple age. In these cases, cutting and replacing the cable is necessary to ensure the continued safe operation of your garage door.
2. Malfunctioning Garage Door
If the garage door isn’t functioning correctly, the cable could be the culprit. A damaged cable can cause the door to become unbalanced, leading to further issues.
3. Breakage
When a garage door cable breaks, the door won’t operate properly. Cutting and removing the broken cable is the first step in installing a new one.
Preparing for the Task
Before you start cutting the cable, it’s important to prepare adequately. Here are the key steps to take:
1. Gather Necessary Tools
- Wire cutters
- Safety gloves
- Screwdriver
- Replacement cable
- Wrench set
2. Ensure Safety Precautions
Always prioritize safety. Wear protective gloves to avoid injuries from the cable strands, and make sure the garage door is supported and won’t suddenly fall during the process.
Step-by-Step Guide to Cutting the Garage Door Cable
Step 1: Disconnect the Power
The first step is to ensure that the garage door opener is disconnected from the power source. This is vital to avoid any accidental operation of the door while you work.
Step 2: Release Tension
Next, release the tension from the garage door springs. This is a critical step since the springs are under high tension and can cause injury if not handled correctly.
Standards for garage doors can guide you further.
Step 3: Locate the Cable
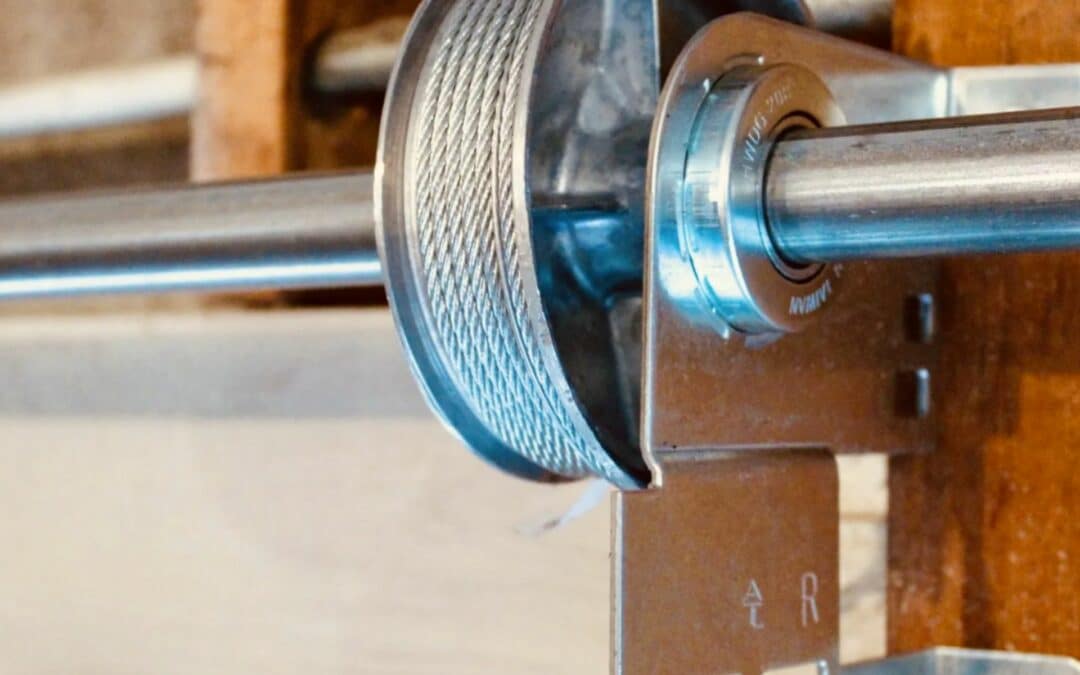
Locate the damaged or worn cable. Understanding the mechanics of a garage door system can aid in this step. Familiarize yourself with the pulley and drum system to know where each part connects.
Step 4: Cut the Cable
Using your wire cutters, carefully cut the cable where it is most worn or broken. Ensure your hands are protected with gloves during this step.
Step 5: Remove the Old Cable
After cutting, remove the cable from the drum and pulley system. Take note of how the cable was threaded through the system to make the installation of the new one easier.
Installing the New Cable
Step 6: Attach the New Cable
Thread the new cable through the drum and pulley system. Make sure it follows the same path as the old cable.
Step 7: Secure the Cable
Secure the garage door cable to the drum and pulley system. Ensure it is tightly wound and not prone to slipping.
Step 8: Re-tension the Springs
Re-tension the springs carefully. This will usually involve winding the springs according to the manufacturer’s instructions. Make sure to use the correct wrench to avoid any damage.
For more on maintaining your garage door, check out our guide on maintenance tips.
Troubleshooting and Testing
Step 9: Test the Door
Once the new cable is installed, reconnect the power to the garage door opener and test the doors operation. Make sure it moves smoothly without any unusual noises.
Step 10: Final Adjustments
If you notice any issues, make the necessary adjustments. Ensure the cable is properly aligned and there is no slack.
Understanding When to Seek Professional Help
While cutting and replacing a garage door cable can be done by a diligent homeowner, there are times when it’s best to seek professional help. If you are unsure at any point during the process or if the springs seem overly complicated, it’s best to contact a professional.
For more information, see our guide on when to replace your garage door.
Conclusion
Knowing how to cut garage door cable< /b> is a valuable skill for any homeowner. By following the steps outlined in this guide, you can address common issues and ensure the proper operation of your garage door. If you ever feel uncertain, dont hesitate to contact a professional to assist you further.
Frequently Asked Questions
1. Is it safe to cut a garage door cable by myself?
While it can be safe, its crucial to follow safety guidelines and ensure the door is secured and the springs are properly handled. If unsure, seek professional help.
2. What tools do I need to cut a garage door cable?
You will need wire cutters, safety gloves, a screwdriver, a replacement cable, and a wrench set.
3. How do I know if my garage door cable needs replacing?
Signs of wear, fraying, rust, or malfunctioning door operation are indicators that the cable may need replacing.
4. Can I use any type of cable for my garage door?
It’s important to use a cable that matches the specifications of your garage door system. Refer to your garage door manufacturer for recommendations.
For more details on garage door maintenance, visit garage door safety standards.


