
Garage doors are vital for the security and functionality of your home. Proper installation of garage door springs is crucial for ensuring smooth operation. In this detailed guide, we will explore the step-by-step process on how to install a garage door spring. This informative article aims to help homeowners with the necessary skills to handle this task effectively and safely, using comprehensive and easily understandable language.
Understanding Garage Door Springs
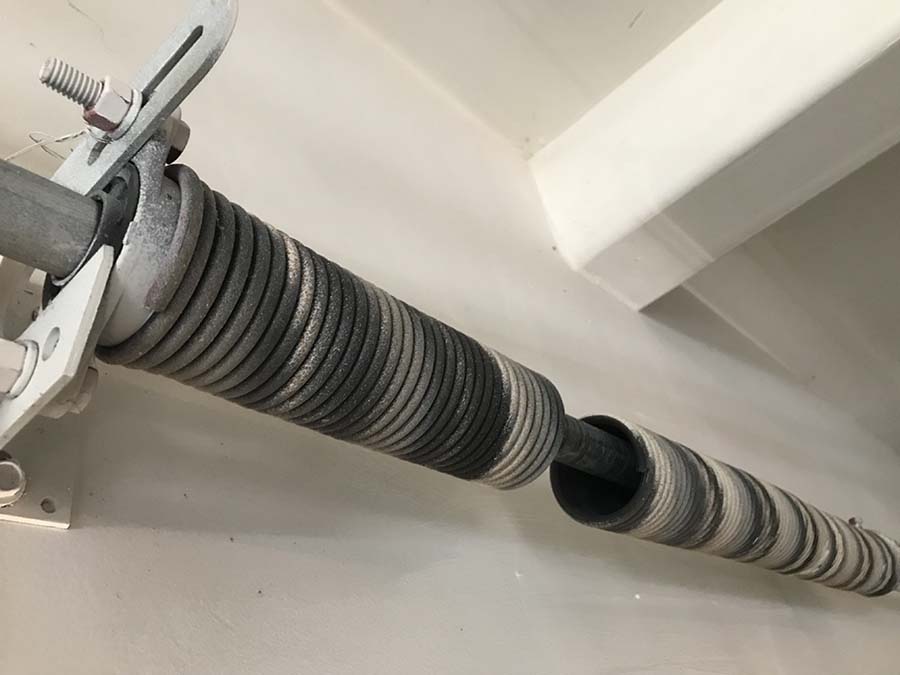
Garage door springs are essential components that support the door’s weight as it opens and closes. There are two main types of springs: torsion springs and extension springs.
Torsion Springs
Torsion springs are located above the garage door and use torque to lift the door. They are usually more durable and safer than extension springs.
Extension Springs
Extension springs are found above the horizontal tracks on both sides of the door. They stretch and contract to counterbalance the door’s weight.
Necessary Tools and Safety Measures
Before starting the installation, gather the following tools and safety equipment:
- Winding bars
- Socket wrench set
- Clamps
- Safety goggles and gloves
- Ladder
Always take safety seriously when working with garage door springs. They hold a lot of tension and can be dangerous if not handled properly. For more garage door safety tips, click here.
Step-by-Step Guide to Installing Garage Door Springs
The process of installing garage door springs can be broken down into the following steps:
1. Remove the Old Springs
First, make sure the garage door is fully closed. Use the winding bars to unwind the tension from the old torsion springs. Next, detach the springs from the door using a socket wrench and carefully remove them.
2. Install the New Springs
Position the new springs on the torsion tube and secure them with the brackets. Ensure the springs are installed tightly to avoid any shifting.
3. Winding the Springs
Using the winding bars, wind the new springs by turning them in the direction specified by the manufacturer. Typically, you’ll need to make about 30-40 quarter turns.
4. Testing the Installation
Once the springs are wound, remove any clamps and carefully test the garage door. Open and close it a few times to ensure it moves smoothly and without jerkiness.
Common Garage Door Spring Issues
While installing a garage door spring, you might encounter some common issues. Here are a few solutions:
- If the door is hard to lift, your springs might need additional winding.
- If the door won’t stay up, you might have over-wound the springs.
For more information on garage door problems and how to fix them, see here.
Frequently Asked Questions (FAQ)
Can I install garage door springs by myself?
While it’s possible for homeowners to install garage door springs themselves, it’s often recommended to hire a professional due to the high tension involved, which can be dangerous.
How often should I replace my garage door springs?
Garage door springs typically need to be replaced every 7-10 years, depending on usage. Regular maintenance can help extend this lifespan. Learn more about the importance of regular maintenance here.
What are the signs of a failing spring?
Signs of a failing spring include difficulty in opening the door, a crooked door, or a sudden slamming of the door. It’s essential to inspect your spring regularly. Find out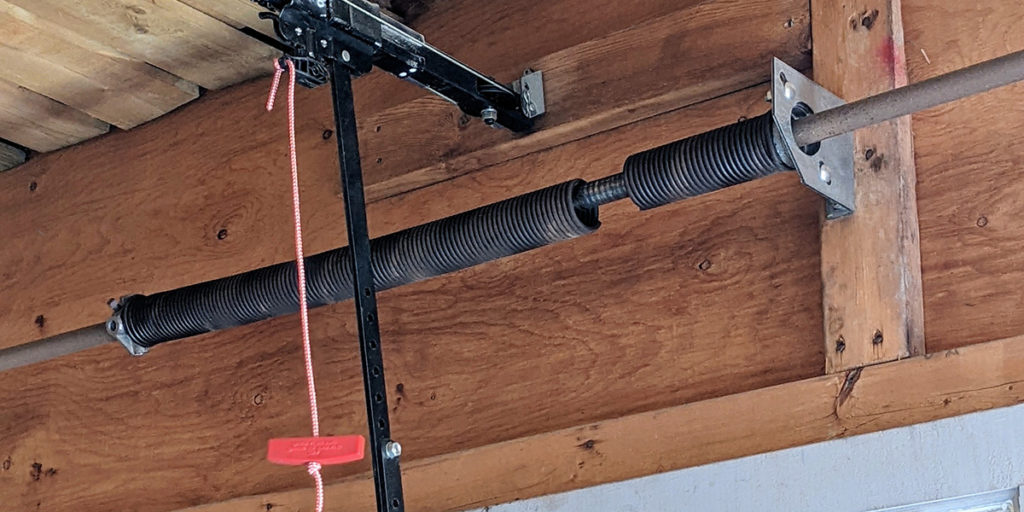 more signs that its time to replace your garage door here.
Conclusion
Installing a garage door spring can be a daunting task, but with the right tools, safety measures, and patience, it can be accomplished successfully. This guide on how to install a garage door spring aims to equip you with the knowledge to tackle the job safely and effectively.
Additional resources are available for those interested in more DIY home repair projects. The following link provides a wealth of information and external resources: repairing your home.


