
Installing a garage door cable might seem daunting, but it’s a vital task that homeowners should know how to handle. Not only does it ensure the smooth operation of your garage door, but it also significantly enhances safety.
By following this comprehensive guide, you will gain all the necessary knowledge to successfully replace and maintain your garage door cables, ensuring your home remains secure and functional.
Understanding the Importance of Garage Door Cables
What Are Garage Door Cables?
Garage door cables are essential components in the functioning of automatic garage doors. They work in conjunction with the torsion springs to lift and lower the door. This division of labor reduces the wear and tear on any single component, thereby prolonging the lifespan of your garage door.
Why Are They Important?
Garage door cables are crucial for maintaining the balance and safety of your garage door. A faulty cable can make the door difficult to operate and even pose a risk of serious injury or damage.
Preparation for Installation
Tools and Materials Required
- Safety glasses
- Work gloves
- Adjustable wrench
- Locking pliers
- Ladder
- New garage door cables
Safety First
Before you begin, wearing appropriate safety gear is crucial. This includes safety glasses and work gloves. Additionally, make sure to disable the garage door opener to prevent any accidental operation.
Step-by-Step Guide to Installing Garage Door Cable
Step 1: Prepare Your Workspace
Clear any obstructions from your workspace and ensure you have easy access to all components of your garage door.
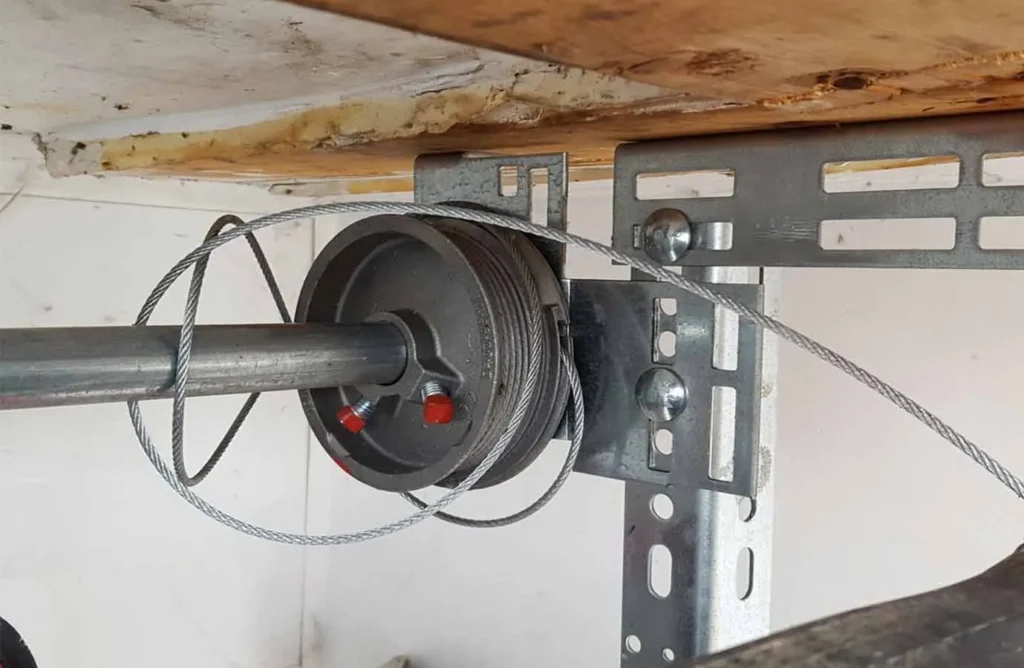
Step 2: Locate the Cables
The cables are typically found running along the sides of the garage door and are attached to the bottom corner brackets and the drums at the top.
Step 3: Release Tension
Using your adjustable wrench and locking pliers, carefully release the tension from the torsion spring before attempting to remove the old cables.
Step 4: Remove Old Cables
Once the tension is released, you can safely detach the old cables from the bottom brackets and the drums.
Step 5: Install New Cables
Attach the new cables to the bottom brackets first, then proceed to run them up and wind them around the drums properly.
Step 6: Reapply Tension
After the new cables are securely in place, gradually reapply the tension to the torsion springs using your adjustable wrench and locking pliers.
Step 7: Test the Door
Once the tension is restored, test the garage door’s functioning to ensure everything operates smoothly.
Maintenance Tips
Regular maintenance is essential to keep your garage door in top condition. Check the cables for signs of wear and tear, and lubricate the moving parts periodically.
Common Mistakes to Avoid
Several common mistakes can occur during the installation process. Avoid using improper tools or neglecting to release the spring tension properly, as these can lead to potential hazards and ineffective installation.
Conclusion
Installing a garage door cable may seem complex, but with the right tools and guidance, it becomes a manageable task. Always prioritize safety and follow each step carefully to ensure a successful installation.
Internal Links
FAQs
How often should garage door cables be replaced?
Garage door cables should be inspected regularly and replaced every 3-5 years or when showing signs of wear.
Can I install garage door cables myself?
Yes, with the right tools and careful attention to safety, homeowners can install garage door cables themselves.
What are the signs of a faulty garage door cable?
Signs include fraying, rust, or difficulty in door operation, indicating it may be time to replace the cables.


