
When it comes to ensuring the smooth operation of your garage door, knowing how to replace a garage door cable is crucial for every homeowner. Cables play a vital role in the functionality and safety of your garage door, so understanding this process can save you both time and money.
Introduction
Garage doors are essential components of our homes, providing security and ease of access. However, like all mechanical systems, they require regular maintenance. One common issue that homeowners face is broken or worn-out garage door cables. This guide to replacing garage door cables will walk you through the steps needed to maintain a fully functional and safe garage door.
Understanding Garage Door Cables
What Are Garage Door Cables?
Garage door cables are responsible for the lifting and lowering of your garage door. They work in conjunction with torsion springs and other mechanisms to facilitate smooth operation.
Types of Garage Door Cables
There are two main types of garage door cables: torsion cables and extension cables. Torsion cables are used in torsion spring systems, while extension cables are used in extension spring systems.
Signs Your Garage Door Cable Needs Replacement
Fraying or Visible Wear
If you notice that the cables are frayed or show visible signs of wear, it’s time to replace them to prevent any safety issues.
Slow or Uneven Movement
Your garage door may move slowly or unevenly if the cables are not functioning correctly. This is a clear sign that a replacement is needed.
Safety Precautions Before Replacing the Cable
Disconnect the Power
Always disconnect the power to your garage door opener to prevent any accidents while working on the door.
Use Safety Gear
Wear gloves and safety glasses to protect yourself from sharp edges and debris.
Step-by-Step Guide to Replacing a Garage Door Cable
Gather Your Tools
Before starting, gather all necessary tools: wrenches, pliers, and new garage door cables.
Release the Tension
Using a winding bar, release the tension from the torsion spring to ensure safety during the replacement process.
Remove the Old Cable
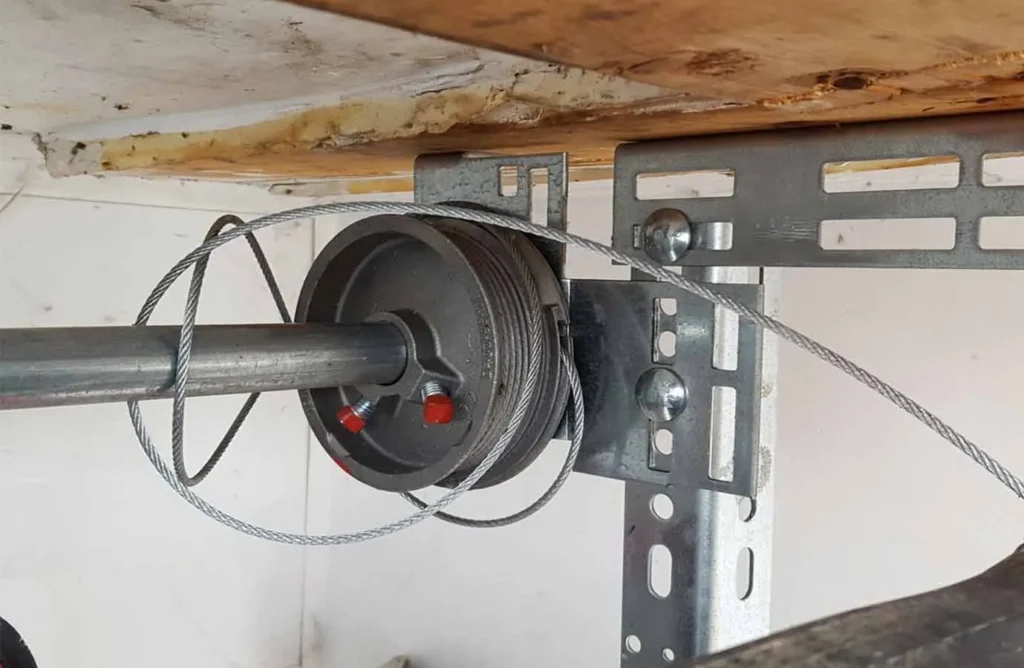
Disconnect the old cable from both the bottom bracket and the drum at the top of the garage door.
Install the New Cable
Attach the new cable to the bottom bracket first, then thread it up to the drum and secure it in place.
Test the Door
Reconnect the power and test your garage door to ensure that it opens and closes smoothly.
Maintenance Tips for Longevity
Regular Inspections
Inspect your garage door cables regularly for signs of wear and tear.
Lubrication
Lubricate the moving parts of your garage door to ensure smooth operation.
FAQs
Q: How often should I replace my garage door cable?
A: It’s recommended to inspect your garage door cables at least once a year and replace them if you notice any signs of wear.
Q: Can I replace the garage door cable myself?
A: Yes, you can, but it’s important to follow 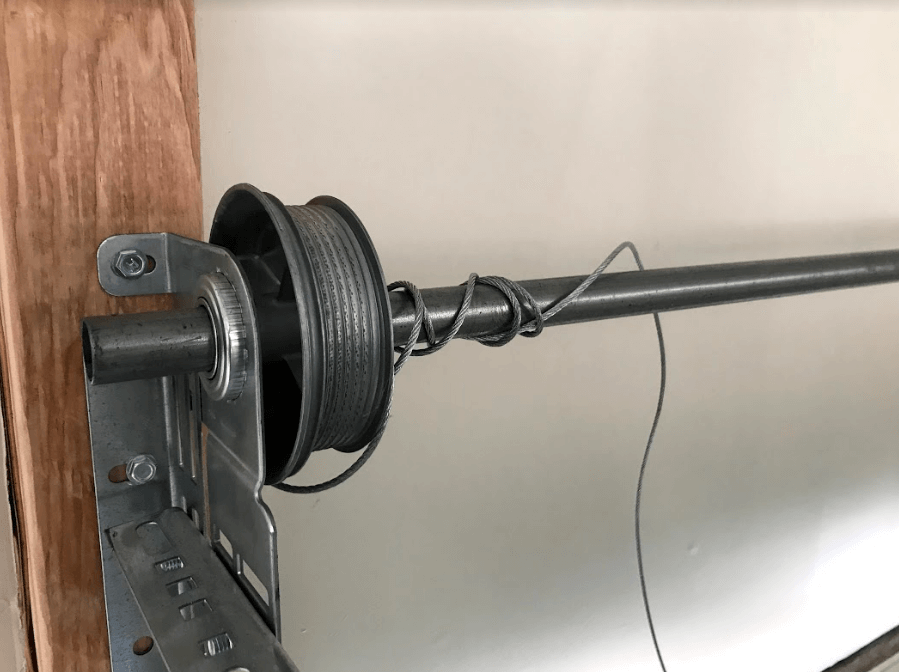 all safety guidelines to avoid any accidents.
Q: What if my garage door still has issues after replacing the cable?
A: If your garage door continues to have problems, it may be best to consult a professional for a thorough inspection.
Conclusion
Knowing how to replace a garage door cable is an essential skill for every homeowner. By following this guide, you can ensure that your garage door remains safe and functional for years to come.
For more information on garage door maintenance, visit garage door safety.


