For homeowners, maintaining a garage door is crucial to ensure smooth operation and enhance the overall safety of their property. One particularly important aspect is knowing how to replace cable drum on garage door. This component plays a vital role in the door’s functionality.
In this article, we will guide you through the steps of replacing a cable drum effectively and safely. Proper maintenance, as explained in our guide on importance of regular garage door maintenance, can save you from costly repairs down the line.

Understanding the Cable Drum: An Overview
What is a Cable Drum?
A cable drum is a crucial part of your garage door system. It works in tandem with torsion springs to lift and lower the door smoothly.
Why Replace a Cable Drum?
Replacing a faulty cable drum is necessary when you notice signs of wear and tear, such as uneven door movement or frayed cables. Ignoring these problems can lead to more significant issues.
Tools and Materials Youll Need
- New cable drum
- Winding bars
- Adjustable wrench
- Socket wrench
- Stepladder
- Safety gloves
Safety Precautions
Before you begin, it is vital to take safety seriously. Follow these steps to ensure a safe work environment:
- Disconnect the garage door opener.
- Use safety gloves to protect your hands.
- Keep a safe distance from the tensioned parts of the door.
Step-by-Step Guide to Replacing a Cable Drum
1. Disconnect the Garage Door Opener
First, ensure that the garage door opener is disconnected to prevent accidental activation during the repair process.
2. Release the Tension in the Springs
Carefully unwind the torsion springs using winding bars. This step is crucial and must be done with extreme caution.
3. Remove the Old Cable Drum
With the tension released, use an adjustable wrench to remove the old cable drum from the torsion tube.
4. Install the New Cable Drum
Attach the new cable drum to the torsion tube, ensuring it is securely fastened. Make sure the cable is properly aligned and free of twists.
5. Re-tension the Springs
Carefully re-tension the torsion springs using winding bars, making sure to follow the manufacturer’s recommendations for tension levels.
6. Reconnect the Garage Door Opener
Once the new cable drum is in place and the springs are correctly tensioned, reconnect the garage door opener.
Troubleshooting Common Issues
Uneven Door Movement
If your garage door moves unevenly after replacing the cable drum, check the alignment and tension of the cables. Ensure they are running parallel and have equal tension.
Noisy Operation
Noisy operations can indicate improper installation. Double-check all connections and lubrication points.
Maintenance Tips for Longevity
Regular Inspections
Inspect your garage door system regularly to catch any signs of wear and address them promptly. Our article on common garage door problems can help identify issues early.
Lubrication
Regularly lubricate the moving parts of your garage door system to ensure smooth operation. This includes the springs, rollers, and hinges.
Professional Maintenance
Consider scheduling professional maintenance at least once a year to keep your garage door in top condition. Refer to our guide on signs to replace your garage door.
External Resources
For additional safety standards and guidelines, visit this comprehensive guide by UL Standards.
Final Thoughts
Knowing how to replace cable drum on garage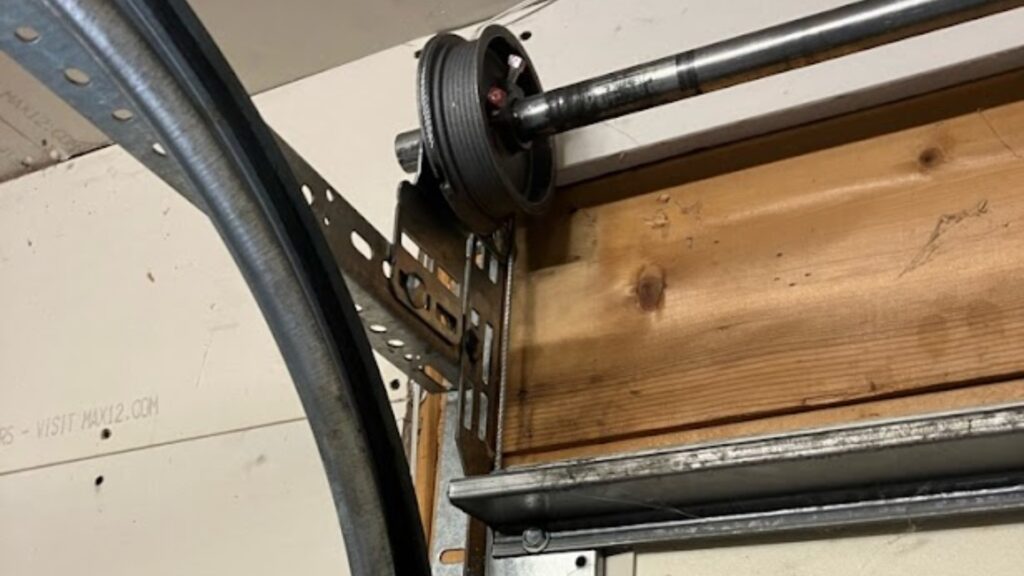 door is a valuable skill for any homeowner. Not only does it save money on repairs, but it also ensures the safety and functionality of your garage door system. For further assistance, consider professional help or refer to the detailed manuals available online.
FAQ
Can I replace the cable drum myself?
Yes, but it requires careful attention to safety precautions and proper tools.
How often should I inspect my garage door system?
Regular inspections should be done at least twice a year to catch early signs of wear.
What if I encounter issues after replacing the cable drum?
If you face any issues, double-check your work and consult a professional if necessary.