
Replacing a garage door cable drum can seem daunting, but with the right knowledge and tools, it’s a manageable task. Whether you’re a seasoned DIY enthusiast or a first-time homeowner, understanding how to replace garage door cable drum is essential. It not only keeps your garage door functioning smoothly but also ensures the safety of your household.
Introduction to Garage Door Cable Drums
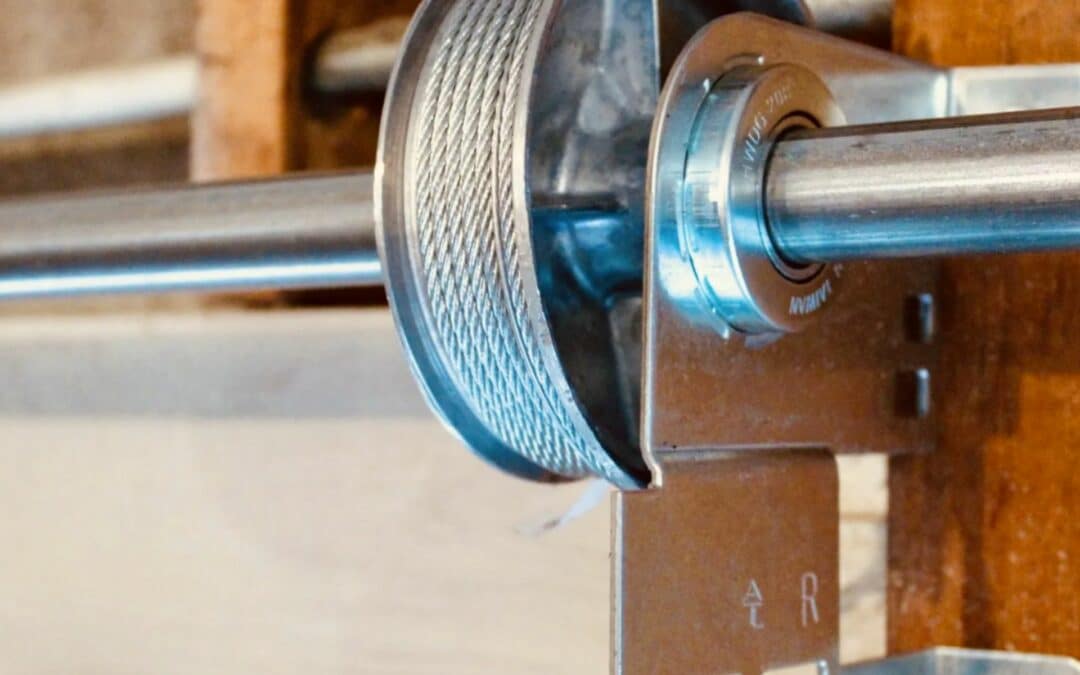
Garage door cable drums are crucial components of your garage door system. They are located at both ends of the torsion shaft and serve to wind and unwind the cables. This mechanism helps to lift and lower the garage door. Over time, garage door cable drums can wear out or get damaged, making replacement necessary.
Why Garage Door Cable Drums Matter
Understanding the importance of cable drums will help you appreciate why their maintenance and timely replacement are so vital. Damaged or worn-out cable drums can lead to uneven lifting, noisy operations, and even complete garage door failure. Regularly inspecting and replacing your cable drums ensures that your garage door operates smoothly and safely.
Common Issues with Cable Drums
Most common problems include frayed cables, misalignment, and wear and tear due to regular use. Identifying these issues early can save you from costly repairs in the future.
Tools and Materials Needed for Replacement
To effectively replace a cable drum, you will need the following tools:
- Winding bars
- Socket wrench
- Vice grips
- New cable drums
- Screwdrivers
- Work gloves
- Safety glasses
Safety Precautions
Before starting, its crucial to take proper safety measures. Wear safety goggles and gloves to protect your eyes and hands. Ensure that the garage door is fully closed and disconnected from the automatic opener to prevent accidental activation.
Step-by-Step Guide to Replacing Garage Door Cable Drums
1. Disconnect the Garage Door Opener
Before you start, make sure to disconnect the garage door opener to avoid any accidental openings.
2. Secure the Garage Door
Use vice grips to secure the door in place to ensure it doesnt move during the replacement process. This is crucial for your safety.
3. Loosen the Torsion Springs
Using winding bars, carefully loosen the torsion springs. Its important to do this step cautiously to avoid any sudden releases of tension.
4. Remove Old Cable Drums
With the springs loosened, you can now remove the old cable drums. Use a socket wrench to dismantle them.
5. Install New Cable Drums
Position the new cable drums and secure them with the socket wrench. Make sure they are aligned properly for smooth operation.
6. Re-tighten the Torsion Springs
After installing the new drums, carefully re-tighten the torsion springs using the winding bars.
7. Test the Garage Door
Once everything is in place, remove the vice grips and reconnect the garage door opener. Test the door to ensure it operates smoothly.
Benefits of Timely Replacement
Replacing a damaged or worn-out cable drum can significantly improve your garage doors performance. It reduces noise, ensures even lifting, and extends the overall lifespan of your garage door system.
Common Mistakes to Avoid
Many homeowners make the mistake of ignoring minor issues, hoping they will go away. However, delaying the replacement of worn-out components can lead to more severe problems. Always address any signs of wear and tear promptly to maintain your garage doors efficiency.
Professional Help vs. DIY
While replacing a cable drum is something you can do yourself, some homeowners may prefer to hire professionals. If youre not confident in your ability to safely perform the replacement, its wise to seek professional help.
Maintenance Tips
Regular maintenance can help you avoid common problems. Make it a habit to inspect your garage door parts regularly. Lubricate moving parts and replace damaged components immediately.
When to Seek Professional Help
If you encounter any difficulties during the replacement process, dont hesitate to call a professional. They have the expertise and tools to handle complex repairs safely and efficiently.
Additional Resources
For more information on maintaining your garage door, check out this guide on regular maintenance. Understanding the importance of routine checks can save you from unexpected problems.
Conclusion: The Importance of Replacing Cable Drums
Replacing your garage door cable drum is an essential part of maintaining your garage doors functionality and safety. By following this guide, you can ensure a smooth and effective replacement process. Remember, regular maintenance and timely replacements can signifi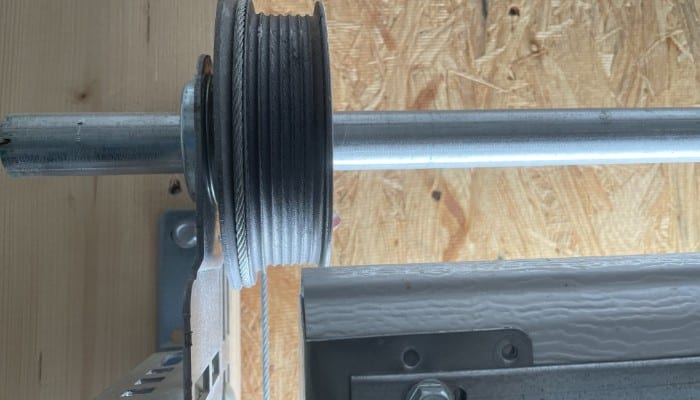 cantly extend your garage doors lifespan.
For more information on garage door maintenance and repairs, you can refer to this external resource.
FAQ
1. What are the signs of a worn-out cable drum?
Common signs include uneven lifting, frayed cables, and noisy operations.
2. How often should I replace my garage door cable drum?
Its recommended to inspect your garage door parts regularly and replace the cable drum as soon as you notice signs of wear and tear.
3. Can I replace the cable drum myself?
Yes, you can, but make sure to follow safety precautions. If youre not confident, its best to seek professional help.


