A malfunctioning garage door sensor can be a major inconvenience, especially when the system refuses to close or open due to a constant “blocked” signal. These safety sensors are designed to prevent accidents, but when they misbehave, they can leave your garage door stuck and your plans on hold. Understanding the causes and solutions for a persistently blocked sensor is essential for restoring your garage door’s reliability and safety.
In this guide, you’ll learn practical steps to diagnose and resolve issues with garage door sensors that are always indicating an obstruction. We’ll cover cleaning, alignment, wiring checks, and when it’s time to consider a replacement. If you’re dealing with related issues, such as sensor mounting on metal studs or wiring problems, you might also find our resource on how to fix garage door sensor mounting on metal studs helpful.

Understanding Garage Door Sensor Blockages
Garage door sensors use an infrared beam to detect obstacles in the path of the door. If anything interrupts this beam, the sensor signals the opener to stop or reverse the door. However, sometimes the sensor may falsely detect a blockage even when nothing is there. This can be caused by dirt, misalignment, wiring issues, or even sunlight interference.
Before diving into troubleshooting, it’s important to know the basic components:
- Photo-eye sensors located on either side of the garage door, about 4–6 inches above the ground.
- Indicator lights on each sensor—usually green and amber—that show power and alignment status.
- Wiring connecting the sensors to the garage door opener unit.
Common Reasons for Persistent Sensor Obstruction
If your garage door refuses to close and the sensor light blinks or stays off, one or more of the following issues may be at play:
- Dirt or debris on the sensor lens
- Misalignment of the sensors
- Wiring problems or loose connections
- Physical damage to the sensor housing
- Direct sunlight or strong light interference
- Faulty sensor or malfunctioning opener logic board
Addressing these issues step by step will help you restore normal operation and avoid unnecessary replacements.
Step-by-Step Guide: Resolving a Constantly Blocked Garage Door Sensor
1. Clean the Sensor Lenses
Dirt, cobwebs, or even water spots can block the infrared beam. Use a soft, dry cloth to gently wipe both sensor lenses. Avoid using harsh chemicals that could damage the plastic.
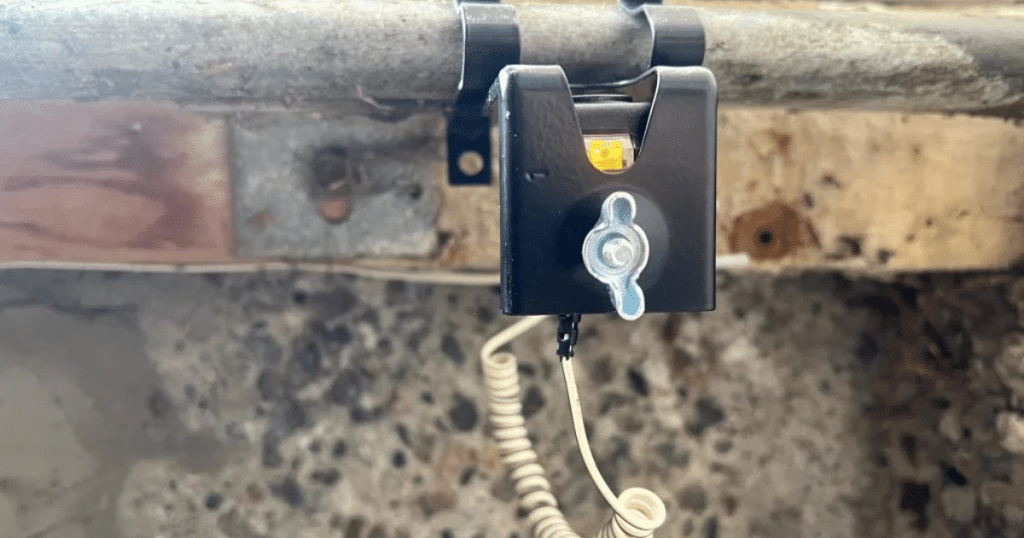
2. Check and Adjust Sensor Alignment
Sensors must face each other directly for the beam to connect. If they’re bumped or jarred, misalignment can occur. To realign:
- Loosen the mounting brackets gently.
- Adjust each sensor until both indicator lights are solid (not blinking).
- Tighten the brackets, ensuring the sensors remain aligned.
If the lights won’t stay solid, try holding the sensor in place by hand to confirm alignment before securing it.
3. Inspect Wiring and Connections
Loose or damaged wires can cause the sensor to lose power or send false signals. Inspect the wires for fraying, corrosion, or disconnection at both the sensor and opener ends. If you notice any issues, you might benefit from reading about how to fix garage door sensor wiring using electrical tape for safe repairs.
Make sure all connections are secure. If you’re not comfortable with electrical work, consider consulting a professional.
4. Remove Nearby Obstructions
Sometimes, small objects like leaves, tools, or even spider webs can break the sensor beam. Double-check the area around the sensors and clear away any potential obstructions.
5. Address Sunlight or Light Interference
Direct sunlight can sometimes interfere with the infrared beam, especially during certain times of day. If this is a recurring problem, try shading the sensors or installing a small cover to block excess light.
6. Test the Sensors
After cleaning and realigning, test the sensors by closing the garage door. If the door closes normally, the issue is resolved. If not, further troubleshooting may be needed.
For a detailed process on testing sensor function, refer to this comprehensive guide on testing faulty garage door sensors.
7. Replace Faulty Sensors
If all else fails, the sensor itself may be defective. Replacement is straightforward and usually involves disconnecting the old unit and wiring in a new one. When purchasing replacements, ensure compatibility with your opener model.
Additional Troubleshooting Tips
- Check for blinking lights on the sensor. Refer to your opener’s manual for specific error codes.
- If the transmitter appears dead, see our article on why is my garage door sensor transmitter dead for more targeted troubleshooting.
- Unusual noises like humming or buzzing may indicate electrical issues. Learn more about how to fix garage door sensor hum or buzz for further guidance.
- If the sensor light blinks twice, you may be facing a specific error. Our resource on why is my garage door sensor light blinking twice explains what this means and how to resolve it.
When to Call a Professional
If you’ve tried all the above steps and your garage door sensor still reports a blockage, it may be time to call a certified technician. Persistent issues could indicate a deeper problem with the opener’s logic board or electrical system. Professional help ensures safety and prevents further damage to your garage door system.
Frequently Asked Questions
Why does my garage door sensor keep saying it’s blocked even when nothing is there?
This usually happens due to dirty lenses, misalignment, loose wiring, or interference from sunlight. Carefully clean and realign the sensors, check for obstructions, and inspect the wiring to resolve the issue.
How do I know if my garage door sensor is faulty?
If cleaning and realigning don’t help, and the indicator lights remain off or blinking, the sensor may be defective. You can follow a step-by-step sensor testing guide to confirm if replacement is necessary.
Can I bypass a garage door sensor that’s always blocked?
Bypassing the sensor is not recommended, as it disables a key safety feature. Instead, address the root cause by cleaning, aligning, or replacing the sensor. If you must temporarily override the system, consult your garage door opener’s manual and restore proper function as soon as possible.
What should I do if the sensor light is blinking twice?
A double-blinking light often indicates a specific error code. Refer to your opener’s manual or see our guide on garage door sensor light blinking twice for troubleshooting steps.
Conclusion
Dealing with a garage door sensor that always reports a blockage can be frustrating, but most issues can be resolved with careful cleaning, alignment, and inspection. Regular maintenance and prompt attention to warning signs will keep your garage door operating safely and reliably. For persistent or complex problems, don’t hesitate to consult a professional for assistance.