Garage door cables are essential for the smooth and safe operation of your garage door. When a cable snaps, frays, or comes off the drum, it can leave your door stuck, unbalanced, or even dangerous to use. Learning how to fix garage door cable issues safely can save you time and money, but it’s important to approach this task with caution and the right information.
This guide covers the most effective do-it-yourself methods for repairing or replacing garage door cables, including the tools you’ll need, step-by-step instructions, and important safety tips. If you’re unsure about any step or feel uncomfortable, always consider calling a professional. For more in-depth solutions and troubleshooting, you can also check out this garage door cable fix resource for fast solutions to broken lines.
Understanding Garage Door Cable Problems
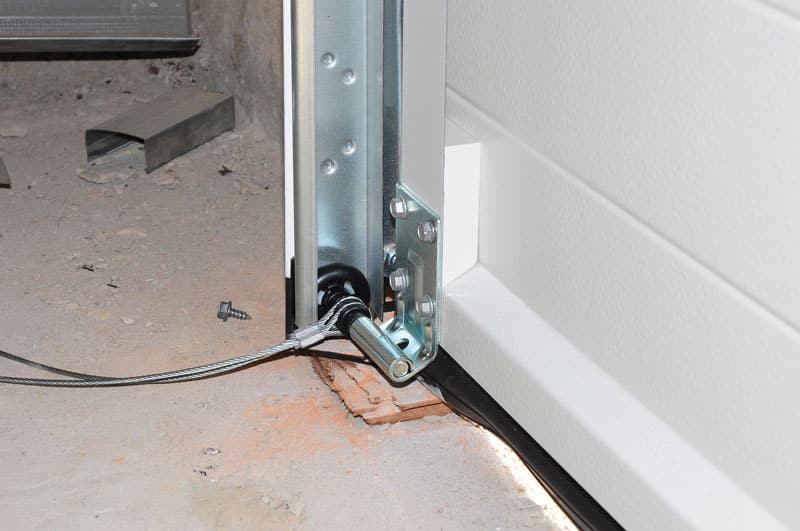
Garage door cables are heavy-duty wires that help lift and lower the door by working in tandem with the springs. Over time, these cables can wear out, fray, or break due to constant tension and movement. Common signs of cable issues include:
- The door is uneven or crooked when opening or closing.
- Visible fraying or kinks in the cable.
- The door gets stuck or won’t open at all.
- You hear loud snapping or grinding noises.
There are two main types of cables: torsion cables (used with torsion spring systems) and extension cables (used with extension springs). Each type requires a slightly different approach for repair. For more details on the differences, see this guide on torsion garage door cables and their function and safety tips.
Safety Precautions Before Starting Repairs
Working on garage door cables can be hazardous due to the high tension in the springs and cables. Always follow these safety tips:
- Disconnect power to the garage door opener to prevent accidental activation.
- Work with the door in the fully open position if possible, and use locking pliers to secure it in place.
- Wear safety glasses and gloves to protect your hands and eyes.
- Never attempt to adjust or remove torsion springs unless you are trained, as they are under extreme tension.
If you’re dealing with a complex repair or a heavy door, it’s best to seek professional help. For professional solutions and expert tips, visit this garage door cable repair page.
Tools and Materials Needed for Cable Repair
Before you begin, gather the following tools and materials:
- Replacement cables (ensure they match your door type and size)
- Winding bars (for torsion spring systems)
- Locking pliers or C-clamps
- Adjustable wrench and socket set
- Screwdrivers
- Stepladder
- Safety gear (gloves and glasses)
You can purchase high-quality replacement kits online. Consider these options for a pulley and cable kit or extension spring cables for your repair project.

Step-by-Step Guide: Replacing a Broken Garage Door Cable
Follow these steps to safely replace a damaged cable. The process may vary slightly depending on whether you have a torsion or extension spring system.
1. Secure the Door and Disconnect Power
Fully open the garage door and secure it with locking pliers or C-clamps just below the bottom roller on both sides. Disconnect the garage door opener to prevent accidental movement.
2. Remove the Old Cable
For torsion spring systems, unwind the spring tension using winding bars before removing the cable. For extension spring systems, release the tension by opening the door fully. Detach the cable from the bottom bracket and drum or pulley system. Inspect the drum or pulley for wear and replace if necessary.
3. Install the New Cable
Attach the new cable to the bottom bracket, then thread it up to the drum or pulley. Ensure the cable is seated correctly in the drum grooves and is not twisted. For extension systems, hook the cable to the pulley and ensure it is taut.
4. Reapply Tension and Test the Door
For torsion systems, carefully wind the spring back to the correct tension using winding bars. For extension systems, check that the cable is taut and the spring is properly stretched. Remove the locking pliers or C-clamps, reconnect the opener, and test the door several times to ensure smooth operation.

Tips for Maintaining Garage Door Cables
Regular maintenance can help prevent cable failures and extend the life of your garage door system. Here are some tips:
- Inspect cables every few months for fraying, rust, or kinks.
- Lubricate moving parts, including pulleys and drums, with a silicone-based spray.
- Keep the tracks clean and free of debris.
- Check the door’s balance by disconnecting the opener and lifting the door manually; it should stay in place when halfway open.
For a comprehensive overview of cable types and their durability, see this article on garage door cable materials to help you choose the best replacement for your needs.
When to Call a Professional
While many homeowners can handle minor cable adjustments or replacements, certain situations require expert attention. Call a professional if:
- The cable has snapped and the door is extremely heavy or stuck.
- You are unsure about handling torsion springs.
- The door is off its tracks or severely unbalanced.
- You notice damage to other components, such as the spring or drum.
Professional technicians have the tools and experience to safely repair or replace cables, ensuring your garage door operates reliably and safely.
More Resources for Garage Door Cable Repairs
If you want to deepen your understanding of how these systems work, this guide on how garage door cables work provides a thorough explanation of cable mechanics and safety considerations. For step-by-step setup and safety information on extension systems, visit this extension garage door cables setup and safety guide.
Frequently Asked Questions
How do I know if my garage door cable needs to be replaced?
Signs that your cable needs replacement include visible fraying, rust, kinks, or the door becoming uneven or stuck. If you notice any of these issues, inspect the cable closely and replace it if necessary to avoid sudden failure.
Can I fix a garage door cable myself, or should I hire a professional?
Many homeowners can safely replace extension spring cables with the right tools and precautions. However, repairs involving torsion springs or extremely heavy doors are best left to professionals due to the risk of injury from high tension components.
What type of replacement cable should I buy?
Choose a cable that matches your garage door’s spring system (torsion or extension) and is rated for the weight and size of your door. Refer to your door’s manual or consult a professional if you’re unsure. For more information, see the section on garage door cable materials.
How often should I inspect my garage door cables?
Inspect your cables at least twice a year, or more frequently if you use your garage door daily. Early detection of wear can prevent sudden failures and costly repairs.
By following these safe repair methods and maintenance tips, you can keep your garage door operating smoothly and avoid unexpected breakdowns. Remember, safety comes first—when in doubt, consult a professional for help with complex or high-tension repairs.