Garage doors rely on sensors to ensure safe and reliable operation. When the track shifts, even slightly, it can throw off the alignment of these sensors, causing the door to malfunction or refuse to close. Understanding how to fix garage door sensor if the track moved is essential for homeowners who want to restore their garage door’s function without calling a professional for every minor issue.
This article walks through the steps to identify, troubleshoot, and resolve problems caused by a misaligned track affecting your garage door sensors. We’ll also cover when it’s time to seek professional help and offer tips to prevent future issues. If you’re dealing with related challenges, such as how to fix garage door sensor mounting on metal studs, you’ll find additional resources linked throughout this guide.
Understanding Garage Door Sensors and Track Alignment
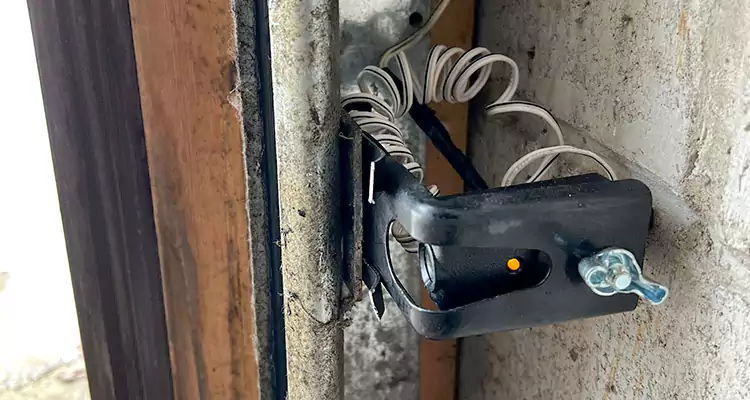
Garage door sensors are safety devices, typically installed near the bottom of the door tracks on each side. They work by sending an invisible beam between them. If anything interrupts this beam, the door stops closing to prevent accidents or damage. However, when the track moves—due to impact, settling, or loose hardware—the sensors can become misaligned, breaking the beam and causing operational issues.
Common symptoms of sensor misalignment include:
- The garage door reverses immediately after starting to close.
- Flashing or blinking sensor lights.
- The door won’t close at all, even though nothing is blocking the sensors.
These issues are often the result of the track shifting, which can pull the sensors out of their correct positions.
Diagnosing Problems When the Track Has Shifted
Before you can repair the issue, it’s important to confirm that the track movement is the root cause. Here’s how to check:
- Inspect the Tracks: Look for visible gaps, bends, or misalignment in the metal tracks on either side of the door. If the tracks are not parallel or flush with the wall, they may have moved.
- Check Sensor Alignment: Each sensor should face directly toward its counterpart. If one sensor appears angled or out of place, the track may have shifted and carried the sensor with it.
- Observe Sensor Lights: Most sensors have indicator lights. A steady light usually means proper alignment, while a blinking or off light signals a problem.
If you notice these signs, it’s likely that the track movement is interfering with the sensor function.
Step-by-Step Guide to Realigning Garage Door Sensors
Once you’ve confirmed that the track has moved and the sensors are out of alignment, follow these steps to restore proper function:
- Disconnect Power: For safety, unplug the garage door opener or switch off the circuit breaker before making adjustments.
- Loosen Sensor Mounting Brackets: Using a screwdriver, gently loosen the screws or bolts holding the sensor brackets to the track. This allows you to move the sensors as needed.
- Reposition the Track (If Needed): If the track itself has shifted, carefully realign it so it’s parallel to the other side and flush against the wall. Tighten any loose bolts or screws to secure the track in place.
- Align the Sensors: Slide the sensors along the track or adjust their angle so they face each other directly. Use a level to ensure both sensors are at the same height.
- Tighten Everything: Once the sensors are aligned and the track is secure, tighten all screws and bolts. Avoid overtightening, which can damage the brackets or sensors.
- Restore Power and Test: Plug the opener back in or turn the breaker on. Test the door by closing it. The indicator lights on the sensors should now be steady, and the door should operate smoothly.
If the door still refuses to close or the sensor lights continue to blink, double-check the alignment and ensure nothing is blocking the sensor beam. For more troubleshooting tips, you can refer to guides like how to fix garage door sensor wiring using electrical tape.
Common Mistakes to Avoid When Adjusting Sensors
While fixing sensor alignment is straightforward, there are a few pitfalls to watch out for:
- Overtightening Brackets: This can crack the plastic mounts or strip the screws, making future adjustments difficult.
- Ignoring Track Issues: If the track is bent or damaged, simply adjusting the sensors won’t solve the problem. Address the track alignment first.
- Forgetting to Check for Obstructions: Even a small spider web or debris can block the sensor beam, so always inspect the area thoroughly.
- Not Leveling Sensors: Sensors must be at the same height and directly facing each other for proper operation.
Taking care during each step will help ensure a lasting repair.
When to Call a Professional
Some garage door issues are best left to experienced technicians, especially if:
- The track is severely bent or damaged.
- There are electrical problems or frayed wires.
- Repeated attempts to align the sensors fail.
Professional help is also recommended if you’re uncomfortable working with electrical components or heavy garage door parts. For more advanced troubleshooting, such as dealing with sensor interference from lighting, see how to fix garage door sensor interference from led bulbs.
Preventing Future Sensor and Track Problems
Regular maintenance can help you avoid sensor misalignment and track movement in the future:
- Inspect Tracks and Sensors Monthly: Look for loose hardware, dirt, or signs of wear.
- Keep the Area Clean: Remove debris, cobwebs, and dust from around the sensors and tracks.
- Tighten Hardware: Check and tighten bolts and screws on the tracks and sensor brackets as needed.
- Test the Door Regularly: Open and close the door to ensure smooth operation and responsive sensors.
Staying proactive with these simple steps can save you time and money in the long run.
Additional Resources and Troubleshooting
If you continue to experience problems, there are many resources available for further troubleshooting. For example, if your sensor lights are blinking and you’re unsure what the pattern means, check out this guide to interpreting garage door sensor blinking lights. For issues related to smart sensors or app connectivity, see how to troubleshoot smart garage door sensor apps. And if your transmitter is not responding, you may want to read why is my garage door sensor transmitter dead.
Frequently Asked Questions
What causes garage door sensors to lose alignment?
Sensors often become misaligned due to track movement, accidental bumps, vibrations from regular use, or loose mounting hardware. Environmental factors like temperature changes can also cause the track to shift slightly over time.
Can I fix a misaligned garage door sensor without special tools?
In most cases, you only need a standard screwdriver or wrench to adjust the sensor brackets and track hardware. A level can help ensure the sensors are properly aligned, but it’s not strictly necessary if you can visually confirm alignment and the indicator lights are steady.
How do I know if the problem is with the sensor or the track?
If the sensors are visibly out of alignment or the track is not parallel, the issue is likely related to track movement. However, if the sensors are aligned and the lights are still blinking, the problem could be electrical, such as damaged wiring or faulty sensors.