Garage door sensors are a critical safety feature, preventing your garage door from closing on people, pets, or objects. But when the indicator lights on these sensors fail to turn on, it can be both confusing and frustrating. Understanding how to troubleshoot garage door sensors with no lights is essential for restoring safe, reliable operation to your garage door system.
This guide walks you through the most common causes and step-by-step solutions for sensor lights that won’t illuminate. Whether you’re a homeowner tackling this for the first time or a DIY enthusiast looking for a refresher, you’ll find practical advice to diagnose and fix the issue. For those dealing with related sensor problems, you may also want to read about why is my garage door sensor indicator light missing for additional insights.
Understanding Garage Door Sensor Lights
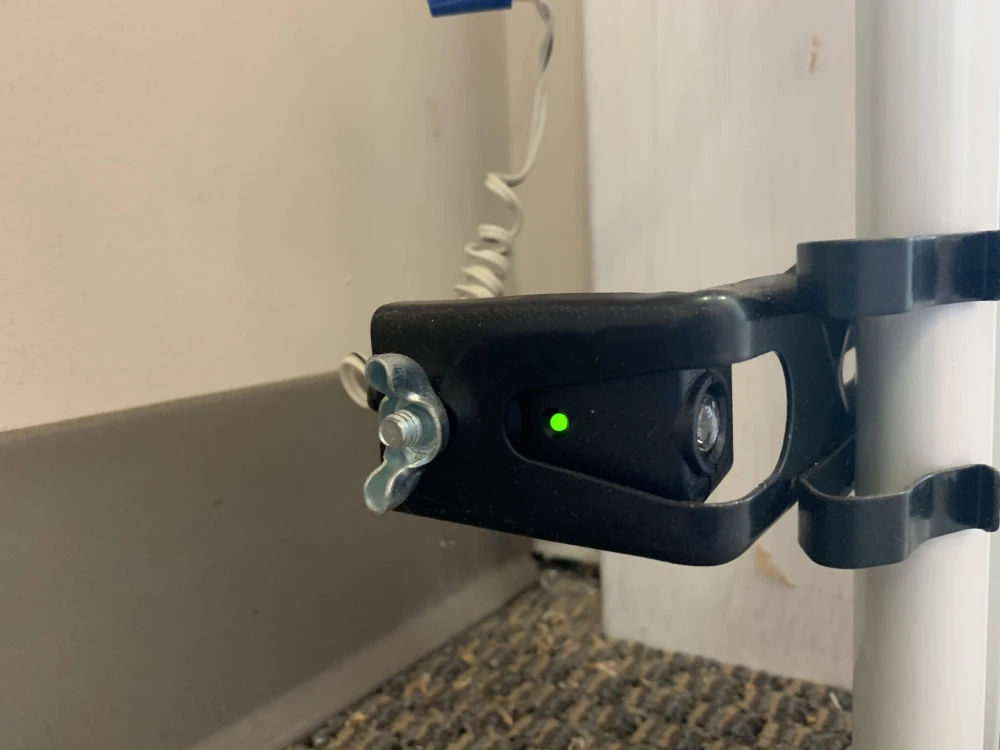
Most modern garage doors use a pair of photoelectric sensors, typically mounted a few inches above the floor on either side of the door. These sensors communicate via an invisible infrared beam. When the beam is interrupted, the door will not close, ensuring safety.
Each sensor usually has an LED indicator. One light (often green) shows the sensor is powered, while the other (often amber or red) confirms the beam is aligned. If neither light is on, it signals a deeper problem—often electrical or wiring-related—that requires troubleshooting.
Common Causes of Sensor Lights Not Working
When both sensor lights are off, several issues could be at play. Here are the most frequent culprits:
- Power supply issues – The sensors may not be receiving electricity due to a tripped breaker, unplugged opener, or faulty power source.
- Wiring problems – Damaged, loose, or disconnected wires can interrupt power to the sensors.
- Sensor misalignment – While misalignment usually causes blinking lights, severe misalignment or physical damage can result in no lights at all.
- Faulty sensors – Sensors themselves may have failed due to age, water damage, or manufacturing defects.
- Opener logic board failure – In rare cases, the garage door opener’s internal electronics may be at fault.
Step-by-Step Guide to Diagnosing Sensor Light Failures
Follow these steps to systematically identify and resolve why your garage door sensor lights are not illuminating:
1. Check the Power Source
Start by confirming that your garage door opener is plugged in and receiving power. Test the outlet with another device, such as a lamp or phone charger. If the outlet is dead, check your circuit breaker or fuse box for a tripped breaker or blown fuse.
If the opener is plugged in and the outlet works, but the sensors remain dark, move to the next step.
2. Inspect Sensor Wiring
Examine the wires leading from the sensors to the garage door opener. Look for:
- Loose or disconnected wires at the sensor or opener terminals
- Visible fraying, cuts, or rodent damage
- Corrosion or water damage at connection points
Gently tug on each wire to ensure it’s secure. If you find any damaged wiring, it may need to be repaired or replaced. For more information on sensor mounting and bracket issues, see how to fix garage door sensor mounting on metal studs and how to fix garage door sensor bracket bending.
3. Test Sensor Alignment and Cleanliness
While a misaligned sensor usually causes blinking or solid lights, extreme misalignment or physical impact can sometimes result in no lights at all. Make sure both sensors are facing each other directly and are mounted at the same height. Clean the sensor lenses with a soft, dry cloth to remove dust or debris.
4. Bypass and Test Sensors Individually
If you’re comfortable with basic electrical work, disconnect one sensor and test the other by swapping their positions or connecting them directly to the opener. If one sensor lights up when swapped, the other may be defective. If neither works, the issue may be with the wiring or opener itself.
5. Examine the Garage Door Opener’s Logic Board
If all wiring and sensors appear intact, but the lights still won’t turn on, the issue could be with the opener’s internal electronics. This is less common but can occur after power surges or lightning strikes. In these cases, professional repair or replacement of the opener may be required.
Resetting and Replacing Garage Door Sensors
Sometimes, a simple reset can restore sensor function. Unplug the opener for 30 seconds, then plug it back in. This can reset the system and restore power to the sensors. For detailed instructions, refer to this step-by-step guide on resetting garage door sensors.
If your sensors still don’t light up after all troubleshooting steps, replacement may be necessary. Replacement sensors are widely available and can often be installed with basic tools. Always follow the manufacturer’s instructions for installation and alignment.
Preventing Future Sensor Light Issues
To minimize the risk of sensor light problems in the future, consider these maintenance tips:
- Periodically check and clean sensor lenses
- Inspect wiring for signs of wear or damage
- Keep the area around sensors free of clutter and debris
- Test the safety reversal system monthly
- Address any blinking or intermittent lights promptly (see why is my garage door sensor light turning off and on for more details)
When to Call a Professional
If you’ve followed all troubleshooting steps and your sensor lights still won’t turn on, or if you’re uncomfortable working with electrical components, it’s best to call a qualified garage door technician. Persistent issues may indicate a more complex electrical fault or a problem with the opener’s control board.
Professional service can ensure your garage door system remains safe and reliable, protecting your family and property.
Frequently Asked Questions
What does it mean if both garage door sensor lights are off?
If neither sensor light is illuminated, it usually means there’s no power reaching the sensors. This could be due to a tripped breaker, unplugged opener, damaged wiring, or a failed sensor or logic board.
Can I bypass garage door sensors if the lights are not working?
While it’s possible to temporarily bypass sensors to close the door, this is not recommended as a permanent solution. The sensors are a key safety feature. Always repair or replace faulty sensors as soon as possible.
How do I know if my garage door sensor is bad?
If you’ve checked power, wiring, and alignment, and the sensor lights still won’t turn on, the sensor may be defective. Swapping the sensors or testing with a multimeter can help confirm if a replacement is needed.
Do I need to replace both sensors if only one is bad?
In most cases, you can replace just the faulty sensor. However, if your sensors are old or mismatched, replacing both may ensure better performance and compatibility.
Conclusion
Dealing with garage door sensors that have no lights can be challenging, but a systematic approach makes troubleshooting manageable. By checking power sources, inspecting wiring, testing alignment, and considering sensor or opener faults, you can identify and resolve most issues. Regular maintenance and prompt repairs will keep your garage door operating safely for years to come.