Replacing garage door cables is a task that demands the right knowledge and the proper set of garage door cable replacement tools. Whether you’re a homeowner tackling a DIY repair or a professional technician, having the correct equipment ensures safety, efficiency, and a successful outcome. This article explores the key tools required, how to use them, and best practices for handling cable replacement projects.
Before diving into the tool list, it’s important to understand that garage door cables are under significant tension. The right approach and equipment can prevent injuries and further damage to your door system. For a deeper understanding of cable mechanics and maintenance, consider reviewing the garage door cable professional guide for technical tips and specifications.
Why the Right Tools Matter for Cable Replacement
Garage door cables are vital for the safe and smooth operation of your door. When these cables fray or snap, the door may become unbalanced or inoperable. Attempting to fix this without the proper cable replacement equipment can be hazardous. The right tools not only make the job easier but also help maintain the integrity of your door system and protect you from potential accidents.
Using substandard or makeshift tools increases the risk of injury, especially when dealing with high-tension springs and heavy panels. Investing in quality, purpose-built tools is essential for anyone working on garage door systems.
Essential Garage Door Cable Replacement Tools
Below is a breakdown of the most important tools you’ll need for replacing garage door cables. Each tool plays a specific role in ensuring the process is safe and effective.
- Winding Bars: These are used to safely wind and unwind torsion springs. Never use screwdrivers or other substitutes, as they can slip and cause serious injury.
- Locking Pliers (Vise Grips): These hold the torsion tube in place, preventing it from spinning unexpectedly during cable replacement.
- Adjustable Wrench: Useful for loosening and tightening bolts on cable drums and brackets.
- Socket Set: A set of sockets and a ratchet are necessary for removing and installing fasteners on the door mechanism.
- Flathead and Phillips Screwdrivers: These are required for various screws and hardware on the garage door assembly.
- Replacement Cables: Always use cables rated for your specific door type (torsion or extension spring systems).
- Stepladder: A sturdy ladder provides safe access to the upper parts of the door and hardware.
- Safety Glasses and Gloves: Personal protective equipment is crucial to shield your eyes and hands from debris and sharp edges.

Specialized Equipment for Different Garage Door Systems
Garage doors typically use either torsion or extension spring systems, and the tools required can vary slightly between the two. Understanding your door’s configuration is the first step in selecting the correct garage door cable replacement tools.
Torsion Spring Doors
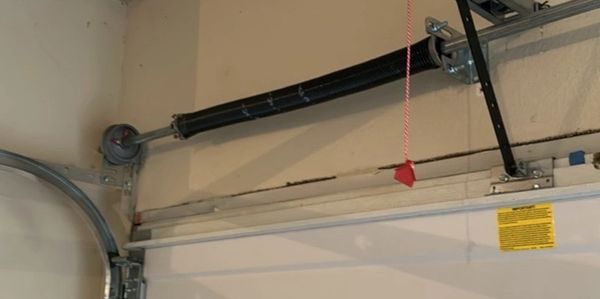
For torsion spring systems, winding bars are absolutely essential. These bars are inserted into the winding cone to safely adjust spring tension. You’ll also need locking pliers to secure the torsion shaft and prevent accidental movement. Cable drums, which guide the cables on each end of the shaft, may require a socket set or wrench for removal and installation.
Extension Spring Doors
Extension spring systems use pulleys and safety cables. In addition to the basic hand tools, you may need a pulley replacement kit and a cable puller for proper tensioning. Always ensure that replacement cables are designed for extension spring setups, as their length and strength requirements differ from torsion systems.
Step-by-Step Guide to Using Cable Replacement Tools
Having the right tools is only half the equation. Knowing how to use them correctly is just as important. Here’s a general outline for replacing cables on a standard garage door:
- Disconnect Power: Unplug the garage door opener to prevent accidental activation.
- Secure the Door: Use locking pliers to clamp the track below the bottom roller, keeping the door in place.
- Release Spring Tension: For torsion systems, insert winding bars into the winding cone and carefully unwind the springs. For extension systems, remove tension by opening the door fully and securing it.
- Remove Old Cables: Detach the cables from the bottom bracket and drum or pulley.
- Install New Cables: Attach the new cable to the bottom bracket and route it over the drum or through the pulley system, ensuring proper alignment.
- Reapply Tension: Use winding bars or a cable puller to restore tension to the springs.
- Test the Door: Remove all tools from the tracks and slowly open and close the door by hand to ensure smooth operation.
For more detailed technical steps and troubleshooting, the garage door cable working principle article provides valuable background on the physics and mechanics involved.

Safety Tips for Handling Garage Door Cable Tools
Working with garage doors always carries a level of risk, especially when dealing with high-tension components. Here are some key safety practices to follow:
- Always wear safety glasses and gloves to protect against flying debris and sharp edges.
- Never attempt to adjust or replace cables without the proper garage door cable replacement tools.
- Do not use makeshift tools like screwdrivers in place of winding bars.
- Ensure the door is fully supported and cannot move unexpectedly during repairs.
- If you’re unsure about any step, consult a professional or refer to a garage door cable corrosion prevention guide for additional maintenance tips.
Maintenance and Longevity of Your Tools
Proper care of your cable replacement equipment extends both tool life and safety. After each use, clean your tools and inspect them for wear or damage. Store winding bars, pliers, and wrenches in a dry location to prevent rust. Regularly check your replacement cables for fraying or corrosion, and replace them as needed to avoid sudden failures.
For seasonal care advice, see the garage door cable seasonal maintenance resource, which covers winter and summer maintenance routines.
Additional Resources and Expert Advice
If you’re new to garage door repairs or want to expand your knowledge, there are many helpful resources available. For a comprehensive overview of cable types, installation tips, and troubleshooting, the garage door gable guide offers practical advice for homeowners and technicians alike.
Regular inspection and timely replacement of cables, combined with the right garage door cable replacement tools, can keep your system running smoothly and safely for years to come.
Frequently Asked Questions
What are the most important tools for replacing garage door cables?
The most critical tools include winding bars (for torsion springs), locking pliers, an adjustable wrench, socket set, screwdrivers, and the correct replacement cables. Safety equipment such as gloves and glasses is also essential.
Can I use regular hand tools instead of specialized garage door tools?
No, it’s not recommended. Specialized tools like winding bars are designed to handle the high tension in garage door springs safely. Using improper tools can lead to serious injury or damage to the door.
How often should I replace my garage door cables?
Garage door cables should be inspected at least once a year for signs of fraying, rust, or wear. Replace them immediately if you notice any damage. Regular maintenance and using high-quality cables can extend their lifespan.