
Every homeowner understands the importance of a well-functioning garage door. Yet, many are not familiar with the intricacies of maintaining it, such as how to crimp garage door cable. This seemingly minor detail can make a tremendous difference in the longevity and safety of your garage door. Whether you’re a seasoned DIY enthusiast or just getting started, this guide will walk you through the process with clarity and confidence. Let’s get started and ensure your garage door operates smoothly for years to come.
What is Garage Door Cable Crimping?
Garage door cable crimping is the process of securely fastening the ends of a garage door cable using specialized crimps. This is crucial for ensuring the cable remains tight and functional. Cables are essential for the safe and efficient operation of your garage door, providing the necessary tension to lift and lower it.
Why is it Important?
Properly crimped cables are vital for the overall safety of your garage door system. If cables are loose or improperly crimped, they could slip, causing the door to malfunction or even fall. This poses a serious safety risk to you and your family.
Materials and Tools Needed
Essential Tools
- Cable Crimper
- Wire Cutters
- Safety Gloves
- Protective Eyewear
- New Garage Door Cable
- Cable Clamp
Optional Tools
- Lubricant
- Ruler or Measuring Tape
Step-by-Step Guide: How to Crimp Your Garage Door Cable
1. Safety First
Before starting any project, safety should always be your top priority. Make sure to wear safety gloves and protective eyewear. Disconnect the garage door opener to avoid any accidental activation while you work on the cable.
2. Remove the Old Cable
To start, you will need to remove the old or damaged cable from your garage door system. Use your wire cutters to carefully cut and remove it, ensuring you don’t damage any other parts of the system.
3. Measure and Cut the New Cable
Next, take out your new garage door cable and measure the required length. Its essential to get this measurement right, so your door operates smoothly. Once measured, use your wire cutters to cut the cable to the needed length.
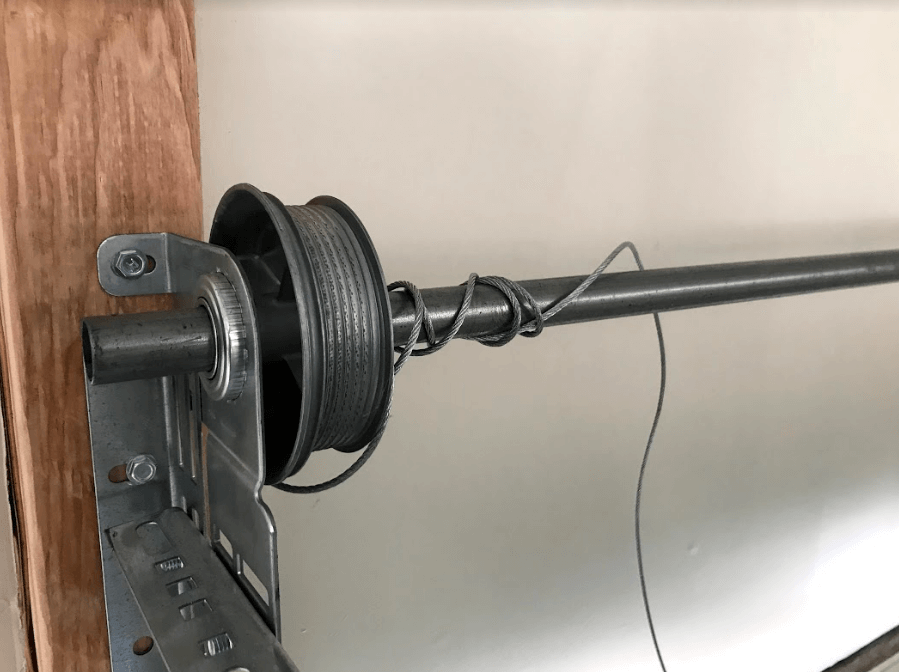
4. Position the Cable Clamp
Position your cable clamp at the end of the cable. Ensure that it is properly aligned before proceeding to crimp.
5. Crimping the Cable
Now, it’s time to use your cable crimper. Insert the cable and the clamp into the crimper and apply steady pressure. Make sure the crimp is tight and secure to prevent any slippage.
6. Reattach the Cable
After crimping, reattach the cable to your garage door system. Ensure it is properly secured and free of any twists or kinks.
7. Test the Garage Door
Finally, reconnect the garage door opener and test the door to ensure it operates smoothly. Make necessary adjustments if needed to achieve perfect tension.
Preventive Maintenance Tips
Regular maintenance is key to extending the life of your garage door system. Here are some maintenance tips:
- Lubricate all moving parts regularly.
- Inspect cables and springs for wear.
- Check the alignment of your door monthly.
Common Mistakes and How to Avoid Them
Incorrect Measurements
Accurate measurement is crucial. Double-check your measurements before cutting the cable to ensure the correct length.
Inadequate Crimping
Ensure you apply sufficient pressure when crimping the cable to avoid any slippage. A weak crimp can lead to failure and pose safety risks.
Overtightening
Overtightening can damage the cable or other components of the garage door system. Aim for a balance, ensuring the cable is tight yet flexible.
Professional Help: When to Call the Experts
While crimping garage door cables can be a DIY project, there are times when it’s best to call in the professionals. If you’re uncertain about any step, or if you encounter issues that you can’t resolve, don’t hesitate to seek expert assistance. For additional resources and expert advice on garage door maintenance, visit the United States Fire Administration [here](https://www.usfa.fema.gov/prevention/home-fires/prevent-fires/basement-and-garage/) or USA.gov [here](https://www.usa.gov/repairing-home).
Conclusion
Knowing how to crimp garage door cables is a valuable skill for any homeowner. This task, when done correctly, ensures the safety and longevity of your garage door system. By following this guide, you can confidently handle this repair and contribute to the overall maintenance of your home. Remember, regular maintenance is key, and knowing when to seek professional help can save you time and effort. For more tips and tricks on maintaining your garage door, check out th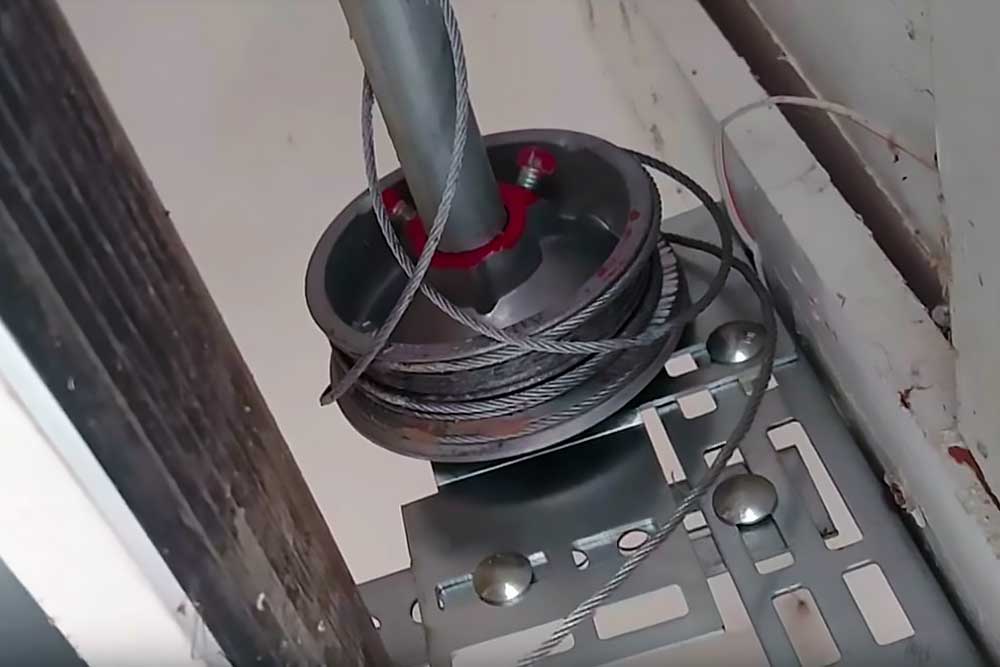 is guide on [garage door maintenance](https://garagedoorsrepairlasvegas.com/the-importance-of-regular-garage-door-maintenance/) or learn [how to replace a garage door cable](https://garagedoorsrepairlasvegas.com/how-to-replace-garage-door-cable-2/).
FAQ
1. How often should I inspect my garage door cables?
Its recommended to inspect your garage door cables at least every six months. Regular inspections ensure early detection of wear and tear.
2. Can I use any cable for my garage door?
No, it’s essential to use cables designed specifically for garage doors. These cables are built to withstand the tension and weight of the door.
3. Is professional installation more reliable?
While DIY is possible, professional installation ensures the cables are crimped and installed correctly, offering greater peace of mind.


