Garage door sensors play a crucial role in ensuring your garage door operates safely and reliably. When the sensor mounts become unstable or start to sag, you may experience issues like misalignment, false reversals, or complete door failure. Addressing these problems promptly is essential for both safety and convenience. This guide will walk you through practical steps for how to fix garage door sensor mount instability and prevent recurring issues.
Before diving into the repair process, it’s important to understand the root causes of sensor mount movement and sagging. Whether you’re dealing with loose brackets, worn hardware, or environmental factors, a systematic approach can restore your garage door’s performance. If you’re also facing challenges with sensor mounting on different surfaces, you may find this resource on how to fix garage door sensor mounting on metal studs helpful.
Common Causes of Sensor Mount Instability
Understanding why your garage door sensor mounts become unstable is the first step toward a lasting solution. Here are some frequent culprits:
- Loose mounting hardware: Screws and bolts can loosen over time due to vibration or repeated use.
- Weak or damaged brackets: Metal fatigue, bending, or corrosion can compromise the integrity of the mounting brackets.
- Improper installation: If the mounts were not installed securely or at the correct height, sagging is likely to occur.
- Environmental factors: Temperature changes, moisture, and accidental bumps can all affect sensor alignment and stability.
- Wall material issues: Drywall, wood, or metal surfaces may require different mounting approaches for optimal stability.
Identifying the specific cause in your situation will help you choose the right repair method and prevent future problems.
Step-by-Step Guide: Stabilizing and Realigning Garage Door Sensors
Follow these steps to address sensor mount movement and sagging. Always disconnect power to your garage door opener before working on the sensors for safety.
1. Inspect the Mounts and Brackets
Begin by visually checking both sensors on either side of the garage door. Look for signs of:
- Loose or missing screws
- Bent or warped brackets
- Cracks in the mounting surface
- Corrosion or rust on metal parts
Gently wiggle each sensor to assess how much movement there is. If the sensor shifts easily, the mount is likely unstable.
2. Tighten All Hardware
Using a screwdriver or socket wrench, tighten all screws and bolts securing the sensor brackets to the wall or frame. If any hardware is stripped or rusted, replace it with new, corrosion-resistant fasteners. For sensors mounted on metal studs, refer to this detailed guide on how to fix garage door sensor mounting on metal studs for best practices.

3. Reinforce Weak or Damaged Brackets
If the brackets are bent or damaged, replace them with new ones designed for your sensor model. Reinforcing the mount with a metal plate or additional support can also help prevent future sagging. Make sure the brackets are flush against the wall and not flexing under the weight of the sensor.
4. Address Wall Surface Issues
Mounting sensors on drywall or other weak surfaces can lead to instability. Use wall anchors or toggle bolts for a more secure hold. For wood surfaces, ensure screws are driven into solid studs rather than just the paneling. If you’re experiencing issues due to temperature changes, see this article on how to fix garage door sensor from shifting due to temperature for additional tips.
5. Realign the Sensors
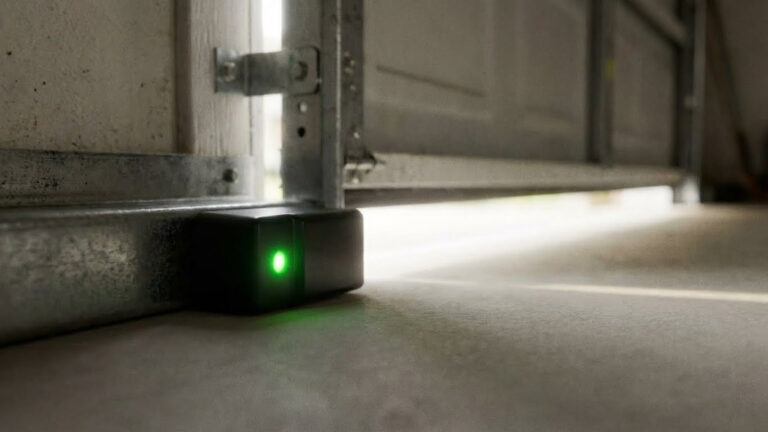
Once the mounts are stable, realign the sensors so they face each other directly. Most sensors have indicator lights to show alignment status. A steady green or amber light typically means the sensors are properly aligned. If the light is off or blinking, adjust the sensor position until the light remains steady.
For more information on what different sensor light colors mean and troubleshooting alignment issues, check out this comprehensive guide to garage door sensor indicator lights.
Preventing Future Sensor Mount Problems
After stabilizing your garage door sensors, take steps to prevent future instability:
- Check and tighten hardware every few months
- Keep the area around the sensors clear of debris and obstructions
- Protect brackets from accidental bumps or impacts
- Use weather-resistant hardware in humid or outdoor environments
- Replace worn or corroded parts promptly
Regular maintenance ensures your garage door operates safely and reliably for years to come.
When to Replace Your Garage Door Sensors
Sometimes, even after stabilizing the mounts, sensors may continue to malfunction due to internal damage or age. Consider replacing your sensors if you notice:
- Frequent false reversals or door not closing
- Indicator lights that won’t turn on, even after realignment
- Visible cracks or water damage on the sensor housing
- Corroded or frayed wiring
New sensors are relatively affordable and can be installed with basic tools. If you’re unsure whether your sensors need replacement, consult your garage door opener’s manual or contact a professional for advice. For issues related to missing indicator lights, see this article on why is my garage door sensor indicator light missing.
Additional Troubleshooting Tips
If your garage door sensors are still not working after stabilizing the mounts, try these troubleshooting steps:
- Clean the sensor lenses with a soft cloth to remove dust or cobwebs
- Check for obstructions in the sensor path
- Inspect wiring for loose connections or damage
- Reset your garage door opener according to the manufacturer’s instructions
For issues like bracket bending, refer to this resource on how to fix garage door sensor bracket bending. If the sensor light turns off and on intermittently, see the guide on why is my garage door sensor light turning off and on for more troubleshooting advice.
Frequently Asked Questions
What tools do I need to fix unstable garage door sensor mounts?
Basic tools such as a screwdriver, socket wrench, level, and possibly a drill are usually sufficient. You may also need replacement screws, wall anchors, or new brackets depending on the extent of the instability.
How can I tell if my garage door sensors are misaligned?
Most sensors have indicator lights that show alignment status. If the light is off or blinking, the sensors are likely misaligned. The garage door may also refuse to close or reverse unexpectedly if alignment is off.
Is it safe to operate my garage door if the sensor mounts are unstable?
No, operating the door with unstable sensors can be dangerous. The safety system may not function correctly, increasing the risk of injury or property damage. Always stabilize and realign the sensors before using the door.
Can temperature changes affect my sensor mounts?
Yes, temperature fluctuations can cause materials to expand and contract, leading to loosening or shifting of the mounts. Using weather-resistant hardware and checking mounts seasonally can help mitigate this issue.
Where can I find more information about garage door sensor troubleshooting?
For more detailed troubleshooting, refer to your garage door opener’s manual or explore resources like the garage door sensor indicator light guide for color meanings and fixes.


