When the cold months arrive, garage door sensors can become vulnerable to moisture, ice, and fluctuating temperatures. These small but essential devices are responsible for the safe and reliable operation of your garage door, and winter conditions can cause malfunctions or false readings. By following a few practical steps, you can protect your sensors and keep your garage door functioning smoothly throughout the season. This guide covers the most effective tips for weatherproofing garage door sensors, helping you avoid common winter issues and extend the lifespan of your equipment.
Before diving into the details, it’s important to understand that weatherproofing isn’t just about preventing water damage—it’s also about ensuring consistent sensor alignment, preventing condensation, and protecting wiring from freezing temperatures. For those dealing with specific installation challenges, such as mounting on metal studs, you may find this resource on how to fix garage door sensor mounting on metal studs helpful as well.
Understanding Why Garage Door Sensors Need Winter Protection
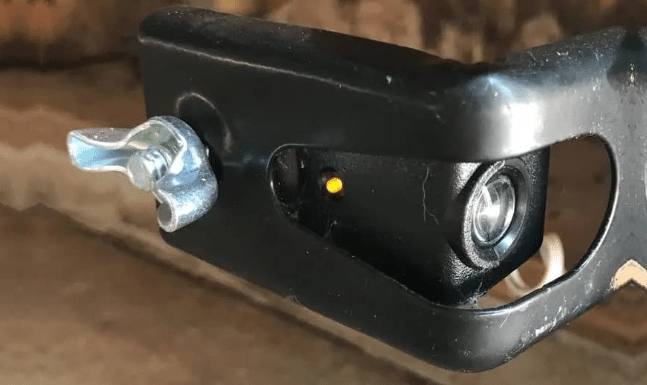
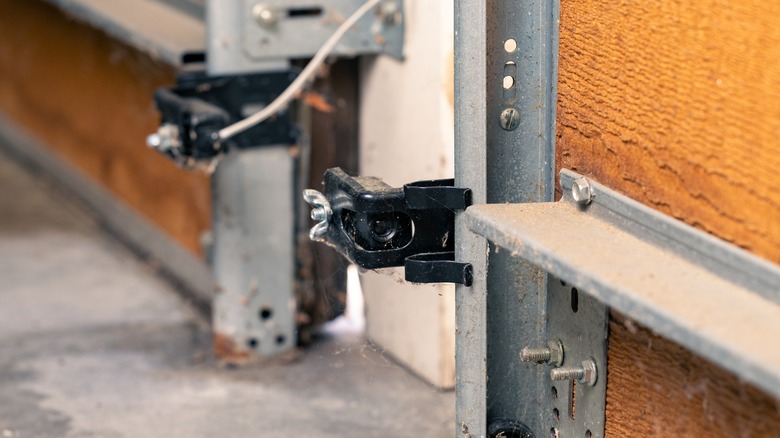
Garage door sensors are typically installed near the ground, making them especially susceptible to snow, ice, and road salt. When exposed to moisture, the sensor’s electronics can corrode or short-circuit, leading to unreliable operation. Cold weather can also cause plastic housings to become brittle, while condensation may fog up the sensor lens, interfering with the infrared beam that detects obstructions.
Winter-related sensor problems can result in your garage door refusing to close, reversing unexpectedly, or showing blinking indicator lights. For more on interpreting these signals, see this detailed guide on what garage door sensor lights mean and how to respond.
Key Tips for Weatherproofing Garage Door Sensors
To ensure your garage door sensors remain reliable all winter, consider these proven strategies:
- Shield Sensors from Direct Exposure: Install a small cover or hood above each sensor to prevent snow and rain from landing directly on the lens or housing. You can use weather-resistant plastic or metal shields, ensuring they don’t block the sensor’s beam.
- Seal Sensor Housings: Apply a bead of exterior-grade silicone caulk around the edges where the sensor housing meets the mounting bracket. This helps keep out moisture and dust without interfering with sensor operation.
- Elevate Sensors Slightly: If your local climate brings heavy snowfall, consider raising the sensors an inch or two above the minimum required height, as long as they remain aligned and functional. This reduces the risk of snow buildup blocking the beam.
- Insulate Exposed Wiring: Use weatherproof electrical tape or conduit to protect exposed wires from freezing temperatures and moisture. For step-by-step instructions, see this guide on how to fix garage door sensor wiring using electrical tape.
- Check and Clean Lenses Regularly: Dirt, frost, and condensation can obscure the sensor lens. Wipe the lenses gently with a soft, dry cloth every few weeks, especially after storms or temperature swings.
- Test Sensor Alignment: Cold weather can cause brackets and mounts to contract or shift. Periodically check that both sensors are facing each other directly and that their indicator lights are steady (not blinking).
Common Winter Problems and How to Prevent Them
Even with the best precautions, winter can introduce unique challenges for garage door sensors. Here are some typical issues and how to address them:
- Condensation Inside the Sensor: Rapid temperature changes can cause moisture to form inside the sensor housing. If you notice fogging or water droplets, unplug the sensor, open the housing if possible, and let it dry completely before resealing with fresh silicone.
- Ice Buildup on the Lens: If ice forms on the sensor, gently remove it with a soft cloth—never use sharp tools that could scratch the lens. Installing a small, angled shield above the sensor helps prevent this problem.
- Salt Corrosion: Road salt can splash onto sensors in driveways. Rinse the area around the sensor with water periodically, and inspect for signs of corrosion or rust.
- False Sensor Readings: If your garage door reverses or refuses to close, check for snow, debris, or misalignment. For troubleshooting specific blinking patterns, you may find this article on why is my garage door sensor light blinking twice useful.
Advanced Weatherproofing Solutions for Harsh Winters
In regions with extreme cold, heavy snow, or frequent freezing rain, basic weatherproofing may not be enough. Consider these advanced options:
- Heated Sensor Covers: Some manufacturers offer covers with built-in heating elements to prevent ice and condensation. These are especially helpful in climates where freezing is persistent.
- Upgraded Sensor Models: If your sensors are old or frequently malfunctioning, upgrading to a newer, weather-resistant model can improve reliability. Look for sensors with sealed housings and high IP (Ingress Protection) ratings.
- Professional Installation: If you’re unsure about DIY weatherproofing, a professional technician can install and seal your sensors properly, ensuring optimal performance and safety.
Maintenance Checklist for Winter Sensor Care
Consistent maintenance is the best way to keep your garage door sensors working through winter. Use this checklist to stay on top of seasonal care:
- Inspect sensor housings and covers for cracks or gaps.
- Clean sensor lenses with a soft, dry cloth every two weeks.
- Check alignment and indicator lights after every major storm or temperature drop.
- Seal any exposed wiring with weatherproof tape or conduit.
- Test the garage door’s safety reversal feature monthly to ensure sensors are functioning.
- Remove snow, ice, and debris from the area around each sensor after shoveling your driveway.
When to Replace or Repair Garage Door Sensors
Even with diligent weatherproofing, sensors may eventually fail due to age or repeated exposure. Signs that it’s time to replace or repair your sensors include:
- Persistent blinking lights or error codes, even after cleaning and realigning.
- Physical damage to the housing, lens, or wiring.
- Intermittent operation or frequent false reversals.
- Corrosion or water damage inside the sensor housing.
If you suspect a deeper issue, such as a dead transmitter, consult this quick guide on why is my garage door sensor transmitter dead for troubleshooting steps.
FAQ: Weatherproofing Garage Door Sensors in Winter
How often should I check my garage door sensors during winter?
It’s a good idea to inspect your sensors at least twice a month during the winter season. After heavy snow, ice storms, or rapid temperature changes, check more frequently to ensure there’s no buildup or misalignment.
Can I use any type of tape to seal sensor wiring?
Not all tapes are suitable for outdoor or cold-weather use. Choose a weatherproof electrical tape designed for exterior applications, as it will adhere better and resist cracking in freezing temperatures.
What should I do if my garage door won’t close in cold weather?
First, check for snow, ice, or debris blocking the sensor beam. Clean the lenses and verify alignment. If the problem persists, inspect for condensation inside the housing or damaged wiring. If you see blinking lights, refer to manufacturer troubleshooting or consult a professional.