When your garage door sensors malfunction, it can leave your garage inaccessible or compromise safety. Addressing sensor issues quickly is important, but having the right equipment on hand makes all the difference. This guide covers the tools needed to repair garage door sensors efficiently, so you can restore your system’s safety and reliability without unnecessary delays.
Whether you’re a homeowner tackling a quick fix or a DIY enthusiast preparing for regular maintenance, understanding which tools are essential will help you troubleshoot problems and complete repairs with confidence. We’ll also highlight practical tips and link to further resources, such as how to test garage door safety sensors for proper function, so you can ensure your repairs are thorough and effective.
Why Proper Tools Matter for Garage Door Sensor Repairs
Attempting to fix garage door sensors without the correct equipment can lead to frustration, incomplete repairs, or even damage to your system. The right tools allow you to work safely, avoid stripping screws or damaging wires, and ensure that sensor alignment and wiring are handled with precision.
Many sensor issues stem from misalignment, loose connections, or dirt buildup. With the proper gear, you can address these problems quickly and restore your garage door’s safety features. Investing in a basic toolkit for this purpose is a smart move for any homeowner.
Core Tools Needed for Garage Door Sensor Troubleshooting
To diagnose and fix most sensor issues, you’ll need a handful of common hand tools and a few specialty items. Here’s a breakdown of the most important tools for the job:
- Screwdrivers: Both Phillips and flathead screwdrivers are essential for removing sensor mounting brackets and adjusting sensor positions.
- Adjustable Wrench: Useful for loosening or tightening nuts and bolts that secure sensor brackets to the door track.
- Wire Strippers and Cutters: If you need to repair or replace sensor wiring, these tools will help you strip insulation and trim wires cleanly.
- Multimeter: For checking voltage and continuity in the sensor wiring, a digital multimeter is invaluable. This helps you identify electrical faults or shorts.
- Level: Ensuring that sensors are perfectly aligned is crucial. A small bubble level or laser level makes this task much easier.
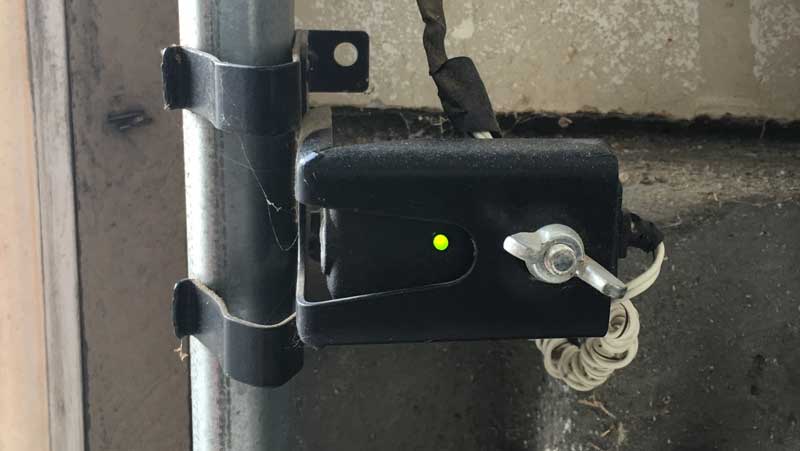
- Cleaning Supplies: A soft cloth and mild cleaner help remove dust, cobwebs, or debris from the sensor lenses, which is a common cause of malfunction.
- Replacement Fasteners: Spare screws or bolts can be handy if originals are stripped or lost during the repair.
- Electrical Tape: For securing wire connections or insulating exposed wires during repairs.
Step-by-Step: Using Your Garage Door Sensor Repair Tools
Once you’ve gathered your toolkit, follow these steps to address the most common sensor issues:
- Disconnect Power: Always unplug the garage door opener or turn off the circuit breaker before working on sensors to prevent accidental activation.
- Inspect and Clean Sensors: Use a soft cloth to gently wipe the sensor lenses. Remove any cobwebs, dust, or debris that could block the beam.
- Check Alignment: Use your level to ensure both sensors are facing each other directly. Adjust the brackets with your screwdriver or wrench as needed.
- Examine Wiring: Look for loose, frayed, or disconnected wires. Use wire strippers and electrical tape to repair or secure connections. For more detailed guidance, see this article on how to check garage door sensor wiring for damage.
- Test Electrical Continuity: With your multimeter, check for voltage at the sensor terminals and continuity along the wiring. Replace or repair any faulty wires.
- Secure Everything: Tighten all screws and bolts, making sure sensors and brackets are firmly attached.
- Restore Power and Test: Plug the opener back in and test the door. If the sensors are working, the door should close smoothly. If not, check for blinking lights or error codes—these can indicate alignment or wiring issues. For troubleshooting specific sensor light patterns, you can refer to a guide on fixing a blinking green sensor.
Advanced Equipment for Difficult Sensor Repairs
While most sensor problems can be fixed with basic hand tools, some situations call for more advanced gear:
- Laser Alignment Tools: These can help achieve perfect sensor alignment, especially if your garage is uneven or the tracks are warped.
- Replacement Sensors: If your sensors are damaged or fail electrical tests, having a compatible replacement on hand can save time.
- Wire Connectors: For splicing new wires or making secure connections, quick-connect terminals or wire nuts are useful.
If you’re unsure about replacing sensors or rewiring, consult a professional or refer to a guide to bypass garage door sensors safely to understand the risks and proper procedures.

Common Mistakes to Avoid When Repairing Sensors
Even with the right tools for repairing garage door sensors, mistakes can happen. Here are some pitfalls to watch out for:
- Forgetting to Cut Power: Always disconnect power before starting work to avoid injury or accidental door movement.
- Overtightening Screws: This can crack plastic sensor housings or strip threads, making future adjustments difficult.
- Neglecting Alignment: Even a small misalignment can prevent sensors from communicating. Always double-check with a level.
- Ignoring Sensor Lights: Blinking or colored lights on the sensors indicate specific errors. Refer to a resource on what the colors on garage door sensors mean to interpret these signals.
- Skipping Electrical Testing: Failing to check wiring with a multimeter can leave hidden faults undetected.
Where to Find More Help and Resources
If you run into persistent issues, there are plenty of resources available. For step-by-step troubleshooting, check out this comprehensive guide to troubleshooting garage door sensors. For more advanced repairs or if you suspect a deeper electrical issue, consider contacting a professional technician.
FAQ
What are the most important tools for fixing garage door sensors?
The essentials include a Phillips and flathead screwdriver, adjustable wrench, wire strippers, a multimeter, a small level, and cleaning supplies. These cover the majority of alignment, wiring, and cleaning tasks.
Can I repair garage door sensors without a multimeter?
While you can address alignment and cleaning issues without one, a multimeter is highly recommended for diagnosing electrical problems. It helps you confirm if power is reaching the sensors and if the wiring is intact.
How do I know if my sensors need to be replaced?
If cleaning, realignment, and wiring checks don’t restore function, and your multimeter shows no voltage or continuity, the sensors may be faulty. Replacing them with compatible models is usually the best solution.
Is it safe to bypass garage door sensors?
Bypassing sensors can compromise safety and is not recommended except in temporary emergency situations. Always restore sensor function as soon as possible and consult a safe bypass guide if needed.
Where can I buy replacement sensor lights or parts?
You can find compatible sensor lights and parts online or at local hardware stores. For convenience, consider purchasing from trusted retailers—see the yellow button above for a recommended option.