Keeping your garage door cables in top shape is essential for both safety and smooth operation. A well-maintained cable system helps prevent unexpected breakdowns, extends the lifespan of your door, and ensures your home remains secure. This garage door cable maintenance checklist provides a clear, step-by-step approach so you can confidently inspect and care for your cables, whether you’re a homeowner or a property manager.
Before diving into the details, it’s important to understand that garage door cables operate under significant tension. If you notice serious wear or damage, or if you’re unsure about any step, consult a professional rather than risking injury. For more in-depth technical advice, you can refer to the garage door cable professional guide for expert tips and specifications.
Why Regular Cable Inspections Matter
Garage door cables are a critical part of the lifting mechanism. They work in tandem with springs to raise and lower the door smoothly. Over time, cables can fray, rust, or become misaligned, leading to operational issues or even sudden failure. Following a structured garage door cable maintenance checklist helps catch these problems early, reducing the risk of costly repairs and enhancing safety for everyone using the garage.
For further reading on how to prevent cable-related issues, check out the garage door cable prevention tips for proactive strategies.
Essential Tools and Safety Precautions
Before starting your inspection, gather the following:
- Work gloves and safety glasses
- Flashlight
- Step ladder
- Garage door lubricant (non-greasy, silicone-based)
- Clean rag
Important: Never attempt to adjust or replace cables under tension unless you have the proper training and tools. Always disconnect the opener and ensure the door is fully closed before beginning any maintenance.
Step-by-Step Garage Door Cable Inspection Guide
1. Visual Assessment of Cables
Start by examining the cables along both sides of the door. Look for:
- Fraying or broken strands
- Rust, corrosion, or discoloration
- Kinks, twists, or signs of unraveling
- Loose cable ends or attachments
If you spot any of these issues, the cable may need to be replaced. For tips on preventing corrosion, see the garage door cable corrosion prevention guide.

2. Checking Cable Tension and Alignment
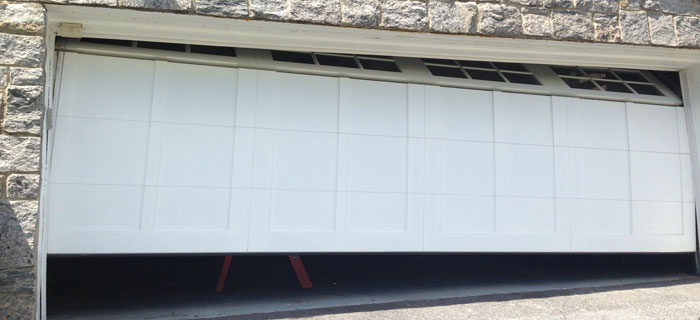
With the door closed and opener disconnected, gently tug on each cable. They should feel taut, not slack. Uneven tension or a cable that appears loose may indicate a problem with the spring system or pulleys. Misalignment can cause the cable to slip off the drum or pulley, leading to operational issues.
If you notice consistent tension problems, consider reading the garage door cable system upgrade article for solutions to modernize and improve your setup.
3. Inspecting Pulleys and Drums
Examine the pulleys (for extension spring systems) or drums (for torsion spring systems) for signs of wear, cracks, or rust. Damaged pulleys can cause cables to fray or slip. Make sure all hardware is securely fastened and rotates smoothly.
4. Lubricating Cables and Moving Parts
Apply a small amount of silicone-based lubricant to the cables, pulleys, and other moving components. Avoid using grease, as it can attract dust and debris. Wipe away any excess with a clean rag. For advice on how often to lubricate, refer to the garage door cable lubrication frequency guide.
5. Testing Door Operation
Reconnect the opener and operate the door several times. Listen for unusual noises and watch for smooth, even movement. If the door jerks, hesitates, or makes grinding sounds, stop and re-inspect the cables and hardware.

When to Replace Garage Door Cables
Even with regular upkeep, cables have a finite lifespan. Replace cables if you observe:
- Multiple broken strands or severe fraying
- Visible rust or corrosion that cannot be cleaned
- Kinks, bends, or deformation
- Signs of slippage or detachment from drums/pulleys
Replacement is best handled by a qualified technician. Attempting to replace high-tension cables without experience can be dangerous.
Pro Tips for Long-Term Cable Health
- Inspect cables every 3–6 months, especially before winter or after storms
- Keep the garage area dry and well-ventilated to minimize rust
- Address minor issues promptly to avoid bigger problems
- Schedule professional maintenance annually for peace of mind
For a deeper understanding of how cables contribute to safety and function, see this detailed overview of cable roles in garage door safety.
FAQ: Common Questions About Garage Door Cable Maintenance
How often should I check my garage door cables?
It’s recommended to inspect your cables at least twice a year. If your garage is used frequently or exposed to harsh weather, quarterly checks are advisable.
What are the warning signs that my cables need attention?
Watch for fraying, rust, kinks, or slack in the cables. Unusual noises or uneven door movement are also indicators that maintenance is needed.
Can I replace garage door cables myself?
While minor cleaning and lubrication can be done by most homeowners, replacing cables is a complex and potentially hazardous task. It’s best left to professionals with the right tools and experience.
Is lubrication necessary for garage door cables?
Yes, applying a light, non-greasy lubricant helps prevent rust and ensures smooth operation. Avoid over-lubricating, as excess can attract dirt.
What should I do if a cable comes off the drum or pulley?
Stop using the door immediately and contact a professional. Attempting to fix a slipped cable without proper knowledge can cause injury or further damage.
Conclusion
Following a structured garage door cable maintenance checklist is the best way to ensure your garage door operates safely and reliably. Regular inspections, prompt attention to minor issues, and timely professional intervention help prevent breakdowns and extend the life of your door system. By staying proactive, you protect your investment and maintain peace of mind for your household.