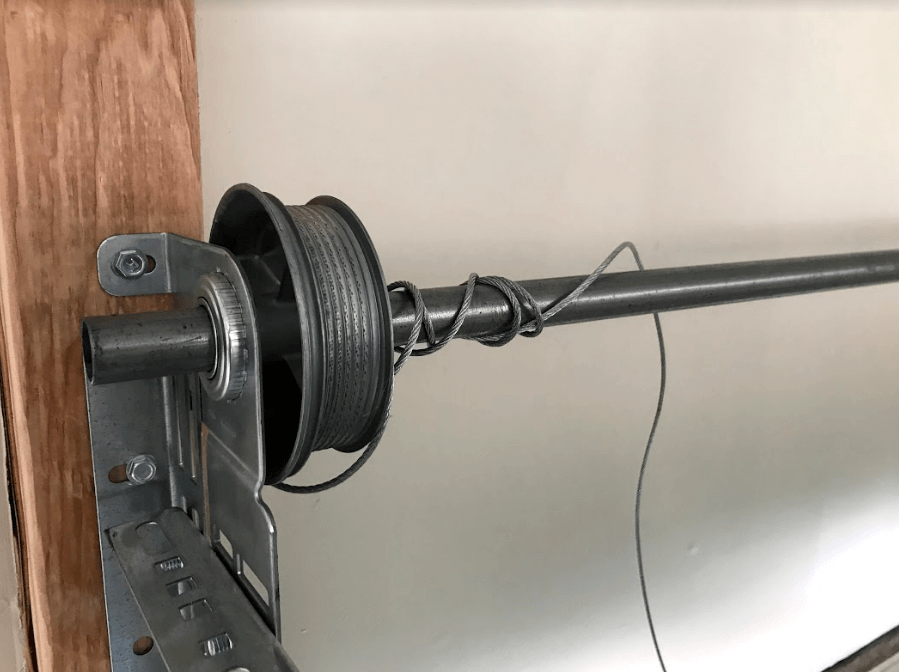
If your garage door isn’t opening or closing smoothly, worn or broken cables are often the culprit. A garage door cable repair kit provides the essential hardware and tools needed to restore safe, reliable operation. Whether you’re a homeowner tackling a DIY fix or a professional seeking a dependable solution, understanding what’s included in these kits and how to use them is crucial for a successful repair.
Garage door cables play a vital role in lifting and lowering the door safely. Over time, cables can fray, snap, or lose tension, leading to operational issues or even safety hazards. Addressing cable problems promptly with the right kit can prevent further damage and costly breakdowns. For a deeper dive into technical tips and specifications, you can consult the garage door cable professional guide for expert insights.
What Comes in a Typical Garage Door Cable Repair Kit?
Most cable repair kits are designed to provide all the core components needed for a standard repair. While the exact contents can vary by manufacturer, you’ll typically find the following parts and tools:
- Cables: Pre-cut, galvanized steel cables sized for standard garage doors, often with looped or crimped ends for easy installation.
- Pulleys: Replacement pulleys to ensure smooth cable movement and reduce wear.
- S-Hooks or Fasteners: Hardware for securing cables to the door and spring system.
- Drums (in some kits): For torsion spring systems, replacement cable drums may be included.
- Instructions: Step-by-step guides to assist with safe installation.
- Basic Tools: Some kits provide wrenches or winding bars, though you may need additional tools depending on your door type.
Choosing a kit that matches your door’s specifications is essential. For example, extension spring systems require different cables and hardware than torsion spring systems. Always check your door’s model and spring type before purchasing a repair kit.
Signs Your Garage Door Cables Need Replacement
Recognizing cable issues early can help you avoid sudden failures and potential safety risks. Here are some common signs that it’s time to consider a cable repair kit:
- The door lifts unevenly or gets stuck halfway.
- You notice frayed, rusted, or visibly damaged cables.
- The door appears crooked or sags on one side.
- There are loud snapping or grinding noises during operation.
- The door won’t open at all, even though the opener is working.
If you observe any of these symptoms, it’s best to stop using the door and inspect the cables closely. Continuing to operate a door with damaged cables can lead to further damage or personal injury.

Choosing the Right Cable Repair Kit for Your Garage Door
Not all garage doors are the same, and neither are the repair kits. Here’s how to ensure you select the correct kit for your needs:
- Identify Your Door Type: Is your door operated by torsion springs or extension springs? Torsion systems are common in newer, heavier doors, while extension springs are often found in older models.
- Measure Your Door: Know the height and width of your garage door. Cable lengths and drum sizes are matched to these dimensions.
- Check Compatibility: Review the kit’s specifications to ensure it matches your door’s brand and model. Some kits are universal, but others are designed for specific systems.
- Quality of Materials: Look for kits with galvanized or stainless steel cables for corrosion resistance and durability.
For a comprehensive checklist on what you’ll need for a successful replacement, the garage door cable replacement checklist can help you prepare for the task ahead.
Step-by-Step Guide to Using a Garage Door Cable Repair Kit
Replacing garage door cables can be a straightforward process if you follow safety guidelines and use the right tools. Here’s a general overview of the steps involved:
- Disconnect Power: Unplug the garage door opener and ensure the door is in the closed position.
- Release Tension: For torsion spring systems, carefully unwind the springs using winding bars. For extension springs, remove tension by opening the door fully and securing it.
- Remove Old Cables: Detach the damaged cables from the drums or pulleys and brackets.
- Install New Cables: Attach the new cables from your kit, following the included instructions. Ensure cables are routed properly and securely fastened.
- Reapply Tension: Wind the springs back to the manufacturer’s recommended tension.
- Test Operation: Reconnect power and test the door’s movement. Make adjustments as needed for smooth, balanced operation.
If you’re unsure about any step, it’s wise to consult a professional or refer to a detailed guide on garage door cables for additional safety tips and troubleshooting advice.

Maintenance Tips to Extend Cable Life
Once you’ve installed new cables, regular maintenance can help prevent future problems. Here are some practical tips:
- Inspect Regularly: Check cables for signs of wear, fraying, or corrosion at least twice a year.
- Lubricate: Apply a light garage door lubricant to cables and pulleys to reduce friction and extend their lifespan. For guidance on how often to lubricate, refer to this garage door cable lubrication frequency resource.
- Keep Tracks Clean: Remove debris and dust from tracks and moving parts to ensure smooth operation.
- Balance the Door: Test the door’s balance periodically. An unbalanced door puts extra strain on cables and springs.
Preventive care is the best way to avoid unexpected breakdowns and maximize the value of your repair kit.
Upgrading and Preventing Future Issues
Sometimes, a simple cable replacement isn’t enough. If your garage door system is outdated or you’re experiencing frequent cable failures, consider a system upgrade. Modern cable systems offer enhanced durability and safety features. Learn more about upgrading your setup with the garage door cable system upgrade guide.
In addition, following garage door cable prevention tips can help you avoid recurring issues and extend the life of your entire door system.
Frequently Asked Questions
How do I know which cable repair kit is right for my garage door?
Start by identifying your garage door’s spring system (torsion or extension) and measuring the door’s dimensions. Check your door’s brand and model, then select a kit that matches these specifications. Universal kits are available, but it’s always best to confirm compatibility before purchasing.
Is it safe to replace garage door cables myself?
Replacing cables can be a DIY project for those with basic mechanical skills, but it involves working with springs under high tension. Always follow safety instructions and use proper tools. If you’re unsure or uncomfortable, it’s safer to hire a professional technician.
How often should garage door cables be replaced?
There’s no set schedule, as cable lifespan depends on usage and maintenance. Inspect cables at least twice a year and replace them at the first sign of fraying, rust, or damage. Well-maintained cables can last several years, but regular checks are essential for safety.