Garage door sensors are essential for the safe and reliable operation of any automatic garage door. When these sensors malfunction, your garage door may refuse to close, reverse unexpectedly, or display confusing blinking lights. This guide to universal garage door sensor troubleshooting will walk you through the most common issues, practical solutions, and preventative tips to keep your system running smoothly.
Whether you’re dealing with a stubborn door that won’t budge or mysterious indicator lights, understanding how to diagnose and resolve sensor problems can save you time, money, and frustration. Before you call a professional, there are several steps you can take to identify and often fix the issue yourself. For those working with unique setups, such as metal framing, you may also want to review how to fix garage door sensor mounting on metal studs for additional guidance.
Understanding How Garage Door Sensors Work
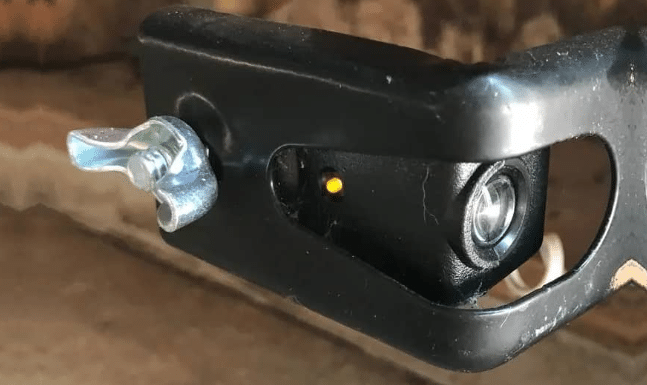
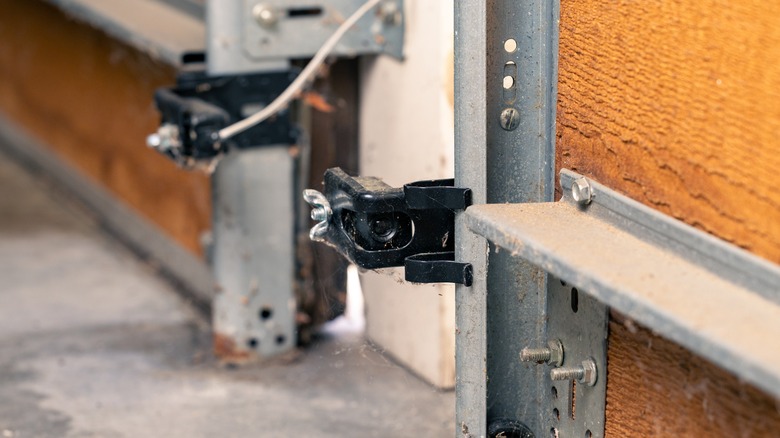
Garage door sensors are typically installed near the bottom of each side of the door, a few inches above the ground. Their main function is to detect obstacles in the path of the closing door, preventing accidents or damage. Most systems use a pair of photoelectric sensors: one sends an infrared beam, and the other receives it. If the beam is interrupted, the door will not close or will reverse direction.
Universal sensors are designed to be compatible with a wide range of garage door openers, but their basic operation remains the same. Issues can arise from misalignment, dirt, wiring problems, or even interference from sunlight or other light sources.
Common Signs of Sensor Problems
Before diving into specific troubleshooting steps, it’s important to recognize the typical symptoms of sensor malfunctions. Here are some of the most frequent indicators:
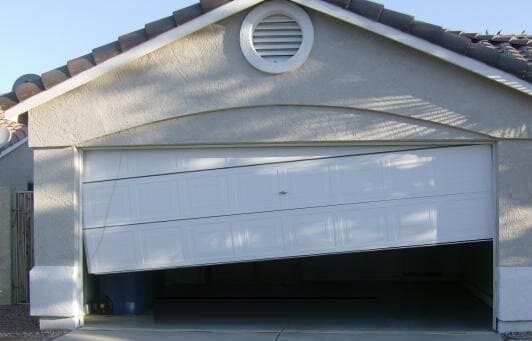
- The garage door won’t close, or reverses immediately after starting to close.
- Indicator lights on the sensors are off, blinking, or displaying unusual colors.
- The opener motor runs, but the door doesn’t move.
- Manual operation works, but automatic operation fails.
Understanding these signs can help you quickly zero in on the root cause and apply the right fix.
Step-by-Step Universal Garage Door Sensor Troubleshooting
When tackling sensor issues, a systematic approach is best. Follow these steps to diagnose and resolve the most common problems:
1. Inspect Sensor Alignment
Misalignment is a leading cause of sensor failure. Both sensors must face each other directly, with their lenses parallel and unobstructed. Even a slight bump can knock them out of position.
- Check that both sensors are mounted at the same height.
- Adjust until both indicator lights are steady (not blinking).
- Tighten mounting brackets to prevent future movement.
2. Clean the Sensor Lenses
Dirt, spider webs, or debris on the sensor lenses can block the infrared beam. Use a soft, dry cloth to gently clean both lenses. Avoid using harsh chemicals, as these can damage the plastic housing.
3. Check for Obstructions and Sunlight Interference
Objects in the path of the sensors, such as bikes, tools, or even leaves, can break the beam. Remove any items near the sensors. Direct sunlight can also interfere with some models, so consider shading the sensors if they face strong sunlight at certain times of day.
4. Examine Sensor Wiring and Connections
Loose, frayed, or damaged wires can disrupt the signal between the sensors and the opener. Inspect the wiring for visible damage and ensure all connections are secure. If you suspect a wiring issue, see this resource on how to fix garage door sensor wiring using electrical tape for step-by-step instructions.
5. Interpret Sensor Indicator Lights
Most sensors have LED lights that indicate their status. A steady light usually means the sensor is working, while blinking or no light suggests a problem. The meaning of each color or blink pattern can vary by manufacturer. For a detailed explanation of what different colors mean and how to respond, review this comprehensive guide to garage door sensor light colors.
6. Test the System
After making adjustments or repairs, test the garage door several times. Ensure it closes smoothly and the sensors respond as expected. If problems persist, you may need to replace the sensors or consult a professional technician.
Advanced Troubleshooting for Persistent Issues
If you’ve followed the basic steps and your garage door sensors still aren’t working, consider these additional troubleshooting strategies:
- Check for electrical interference: Nearby electronic devices or faulty power supplies can disrupt sensor operation.
- Inspect for moisture or corrosion: Water ingress or rust can damage sensor components, especially in humid environments.
- Replace sensors with universal models: If your sensors are outdated or incompatible, upgrading to a universal set can resolve persistent compatibility issues.
For cases where the transmitter itself is unresponsive, see the article on why is my garage door sensor transmitter dead for more targeted advice.
Preventative Maintenance Tips
Regular maintenance can help you avoid most sensor problems before they start. Here are some best practices:
- Clean the sensor lenses monthly to prevent dust buildup.
- Check alignment and tighten brackets twice a year.
- Inspect wiring annually for signs of wear or rodent damage.
- Test the door’s safety reversal feature regularly to ensure proper operation.
By following these simple steps, you can extend the lifespan of your sensors and maintain reliable garage door performance.
When to Call a Professional
While most sensor issues can be resolved with basic troubleshooting, some situations require expert help. If you notice burning smells, exposed wires, or repeated sensor failures, it’s best to contact a licensed garage door technician. Professional service is also recommended for complex electrical repairs or full system replacements.
For issues like persistent humming or buzzing noises from your sensors, you can refer to this resource on how to fix garage door sensor hum or buzz for additional troubleshooting steps.
Frequently Asked Questions
Why does my garage door sensor light keep blinking?
A blinking sensor light usually indicates misalignment, obstruction, or wiring issues. Check that both sensors are facing each other, clean the lenses, and ensure there are no objects blocking the beam. For more details on specific blink patterns, see why is my garage door sensor light blinking twice.
Can I use any universal sensor with my garage door opener?
Most universal sensors are compatible with a wide range of openers, but always check your opener’s manual or manufacturer’s website for compatibility information. Some older models may require specific sensors or adapters.
What should I do if cleaning and realigning the sensors doesn’t fix the problem?
If basic cleaning and alignment don’t resolve the issue, inspect the wiring and connections. Replace damaged wires or sensors if needed. If the problem persists, consult a professional technician to avoid further damage or safety risks.
By following these troubleshooting tips and maintenance practices, you can keep your garage door sensors functioning reliably and ensure the safety of your home and family.