Dealing with a misaligned garage door sensor can be frustrating, especially when working in cramped or awkward areas. Proper sensor alignment is crucial for the safe and reliable operation of your garage door. If the sensors are out of alignment, your door may refuse to close, or you might notice blinking lights and error messages. This guide provides practical steps and tips for realigning garage door sensors when space is limited, helping you restore smooth operation without the need for professional intervention.
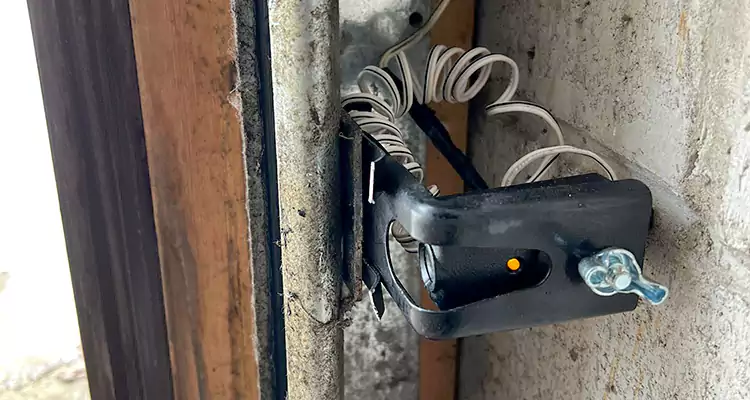
Before you start, it’s helpful to understand how these safety sensors work. Garage door sensors, typically mounted near the bottom of the door tracks, use an infrared beam to detect obstacles. When the beam is interrupted or the sensors are not facing each other correctly, the door will not close as a safety precaution. Tight spaces can make accessing and adjusting these sensors more challenging, but with the right approach, you can get the job done efficiently.
For those dealing with other sensor-related challenges, such as how to fix garage door sensor mounting on metal studs, there are additional resources available to help you address specific installation scenarios.
Understanding Common Sensor Alignment Issues in Confined Areas
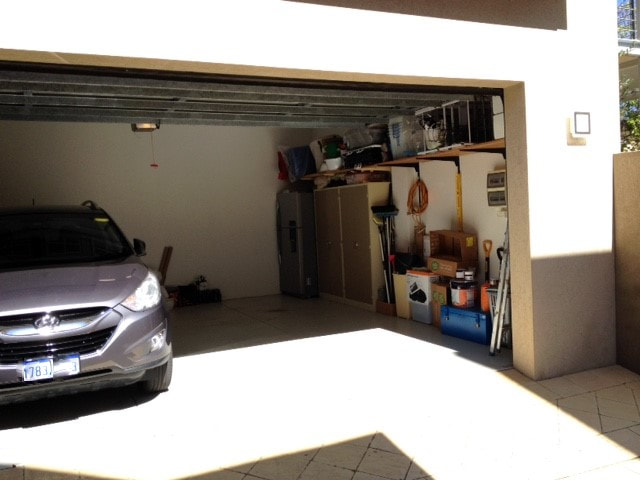
When space is tight, several factors can make sensor alignment more difficult. Obstructions like shelving, stored items, or even the garage door track itself can limit your ability to reach and adjust the sensors. In some cases, the mounting brackets may be difficult to access, or the wiring may be routed in a way that restricts movement.
- Limited access to sensor brackets due to walls or objects
- Obstructed line of sight between sensors
- Difficulty using tools in narrow spaces
- Potential for accidental bumps that knock sensors out of alignment again
Recognizing these challenges is the first step toward finding effective solutions. By preparing the area and using the right techniques, you can overcome most obstacles associated with sensor adjustment in small or cluttered garages.
Preparing for Sensor Realignment in Small Spaces
Before making any adjustments, take a few minutes to prepare your workspace. This will help you avoid unnecessary frustration and ensure a safer, more efficient process.
- Clear the area: Move any objects or storage bins that block access to the sensors. Even a few extra inches of space can make a big difference.
- Gather necessary tools: You may need a screwdriver, a small level, a flashlight, and possibly a mirror to see behind obstacles.
- Power off the garage door opener: For safety, unplug the opener or switch off the circuit breaker before working near the sensors.
- Inspect the sensors and wiring: Check for visible damage, loose wires, or debris that could interfere with sensor operation.
If you notice issues with the sensor wiring, consider reviewing advice on how to fix garage door sensor wiring using electrical tape for safe and effective repairs.
Step-by-Step Guide to Adjusting Garage Door Sensors in Tight Quarters
With your workspace prepared, follow these steps to realign your sensors even when access is limited:
- Loosen the mounting brackets: Use a screwdriver to gently loosen (but not remove) the screws holding the sensor brackets. This will allow you to move the sensors for alignment.
- Use a level or visual cues: In tight spaces, a small bubble level can help ensure the sensors are at the same height. If a level won’t fit, use a straight object (like a ruler) or align the sensors visually by looking along the path between them.
- Check the indicator lights: Most sensors have LED lights that indicate alignment. A solid light typically means the sensors are properly aligned, while a blinking light suggests a problem. For more details on interpreting these signals, see this guide to garage door sensor blinking lights.
- Secure the sensors: Once aligned, carefully tighten the screws. Be cautious not to overtighten, as this can cause the brackets to shift or damage the sensor housing.
- Test the system: Restore power to the opener and test the door. The door should close smoothly when the sensors are aligned and unobstructed.
Tips for Maintaining Sensor Alignment in Narrow Areas
After successfully adjusting your sensors, it’s important to keep them aligned to avoid future issues. Here are some practical maintenance tips:
- Secure loose wiring with cable clips or electrical tape to prevent accidental tugs that could move the sensors.
- Mark the sensor positions with a pencil or tape so you can quickly spot if they’ve shifted.
- Check alignment periodically, especially after moving items around the garage or if you notice the door behaving erratically.
- Keep the sensor lenses clean by wiping them gently with a soft cloth to remove dust or cobwebs.
If you encounter persistent problems, such as unusual noises or repeated misalignment, you may want to investigate related issues like how to fix garage door sensor hum or buzz for further troubleshooting.
When to Replace or Upgrade Your Garage Door Sensors
Sometimes, realignment may not resolve the issue, especially if the sensors are old, damaged, or malfunctioning. Signs that it’s time to replace your sensors include:
- Persistent blinking lights even after careful alignment
- Visible cracks or water damage on the sensor housing
- Intermittent operation or frequent false triggers
- Corroded or frayed wiring that cannot be safely repaired
Upgrading to new, reliable sensor units can improve safety and reduce the need for frequent adjustments. If you’re experiencing issues like why is my garage door sensor light blinking twice, a replacement may be the best solution.
Frequently Asked Questions
What tools do I need to align garage door sensors in a tight space?
The most useful tools are a small Phillips or flathead screwdriver, a compact bubble level, a flashlight, and sometimes a handheld mirror. These help you access brackets, check alignment, and see behind obstructions without needing to move heavy items.
How do I know if my garage door sensors are aligned correctly?
Most sensors have indicator lights. When the sensors are facing each other and unobstructed, the light should remain solid. If the light blinks or goes out, the sensors are likely misaligned or something is blocking the beam.
Can I fix sensor alignment myself, or should I call a professional?
In most cases, you can handle sensor alignment on your own, even in confined spaces, by following the steps outlined above. However, if you encounter damaged wiring, broken brackets, or persistent malfunctions, it may be best to consult a garage door technician.
Why does my garage door sensor keep getting knocked out of alignment?
Frequent misalignment can be caused by vibrations from the door, accidental bumps, or unsecured wiring. Marking the sensor positions and securing wires can help maintain proper alignment over time.
Conclusion
Adjusting garage door sensors in restricted areas can be challenging, but with careful preparation and the right techniques, it’s a task most homeowners can tackle. Regular maintenance and prompt attention to alignment issues will keep your garage door operating safely and reliably. If you continue to experience problems, don’t hesitate to seek expert help or consider upgrading your sensor system for improved performance.