Garage door sensors are essential for safety and proper operation, but issues with their wiring and connections can cause frustrating malfunctions. If your garage door won’t close, or the sensor lights are blinking or red, the culprit is often a loose or faulty wire nut connection. Understanding how to fix garage door sensor wire nuts can save you time, money, and the hassle of waiting for a technician.
This guide will walk you through the process of diagnosing and repairing sensor wiring issues, including how to identify bad connections, safely work with wire nuts, and ensure your sensors are functioning reliably. Before you begin, make sure you have basic tools and take necessary safety precautions.
For those dealing with more complex setups, such as metal framing, you may also find it helpful to review how to fix garage door sensor mounting on metal studs for additional tips on securing and protecting your wiring.
Common Signs of Faulty Sensor Wire Connections
Before diving into repairs, it’s important to recognize the symptoms of a bad wire nut or loose connection. Some of the most frequent indicators include:
- The garage door reverses immediately after touching the floor or won’t close at all.
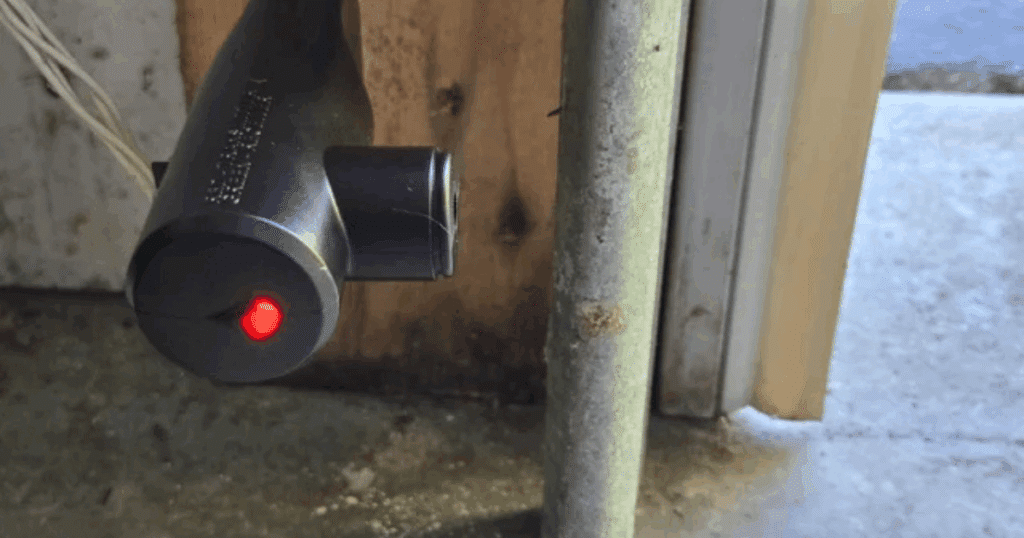
- One or both sensor lights are off, blinking, or showing a red indicator.
- The opener’s control panel displays an error code related to the sensors.
- Wiggling the sensor wires causes the lights to flicker or change color.
These issues often point to a problem with the wiring at the sensor or the connections inside the wire nuts. Addressing these problems promptly helps prevent further damage to your garage door system.
Tools and Materials Needed for Repair
To successfully address issues with your garage door sensor wiring, gather the following items:
- New wire nuts (preferably weather-resistant)
- Wire stripper/cutter
- Electrical tape (for extra protection)
- Multimeter (optional, for testing continuity)
- Small flathead screwdriver
- Step ladder
- Protective gloves and safety glasses
Having these tools on hand will make the process smoother and safer.
Step-by-Step Guide: Repairing Garage Door Sensor Wire Nuts
Follow these steps to restore proper function to your garage door safety sensors:
1. Disconnect Power to the Opener
Always start by unplugging the garage door opener or turning off the circuit breaker. This ensures your safety while working on electrical connections.
2. Inspect the Sensor Wires and Connections
Locate the sensors near the bottom of the garage door tracks. Examine the wires leading to each sensor, paying close attention to where they join with wire nuts. Look for:
- Loose or exposed wires
- Corrosion or moisture inside the wire nuts
- Frayed insulation or broken strands
If you notice any of these issues, proceed to repair the connection.
3. Remove and Replace Faulty Wire Nuts
Carefully unscrew the wire nuts from the sensor wires. If the wires are twisted together but not secure, untwist them and trim off any damaged ends. Use a wire stripper to remove about 1/2 inch of insulation from each wire.
Twist the wires together tightly in a clockwise direction, ensuring a solid connection. Place a new wire nut over the twisted wires and turn it until it feels snug. Give each wire a gentle tug to confirm it’s secure.
4. Add Extra Protection (Optional)
For added durability, especially in damp or outdoor environments, wrap the base of the wire nut and exposed wire with electrical tape. This helps prevent moisture from entering and causing corrosion.
If you want to explore alternative repair methods, such as using tape instead of wire nuts, check out how to fix garage door sensor wiring using electrical tape for a detailed walkthrough.
5. Restore Power and Test the Sensors
Plug the opener back in or turn on the breaker. Check the sensor lights: both should be solid (usually green or amber, depending on the brand). Try closing the garage door. If it operates smoothly, the repair was successful.
If the problem persists, double-check your connections or use a multimeter to test for continuity. Misalignment or other sensor issues may also be at play—see how to test garage door sensor alignment without tools for more troubleshooting advice.

Tips for Preventing Future Wire Nut Issues
Once you’ve restored your sensor wiring, a few simple practices can help prevent future problems:
- Use high-quality, appropriately sized wire nuts for a secure fit.
- Keep connections dry and protected from the elements.
- Periodically check sensor wires for signs of wear or corrosion.
- Secure wires to prevent them from being pulled or pinched by moving parts.
Regular maintenance reduces the risk of unexpected sensor failures and keeps your garage door operating safely.
Understanding Sensor Light Indicators
Sensor lights provide valuable clues about the status of your wiring and alignment. For example, a solid green or amber light usually means the sensors are communicating properly, while a blinking or red light often points to a wiring or alignment problem.
If you’re unsure what the different sensor light colors mean, you can learn more by reading this guide to garage door sensor light colors and troubleshooting. Understanding these indicators can help you quickly identify whether the issue is with your wiring or another component.
When to Call a Professional
While most homeowners can handle basic wire nut repairs, there are situations where professional help is recommended:
- You notice melted, burned, or severely corroded wires.
- The sensors remain unresponsive after multiple repair attempts.
- There is visible damage to the opener’s wiring harness or control board.
- You are uncomfortable working with electrical components.
In these cases, contacting a qualified garage door technician ensures your system is repaired safely and correctly. For issues related to sensor transmitters, see why is my garage door sensor transmitter dead for a quick troubleshooting guide.
Frequently Asked Questions
What causes garage door sensor wires to come loose?
Sensor wires can become loose due to vibration from the door’s movement, improper installation, or exposure to moisture and temperature changes. Using the correct wire nuts and securing the wires can help prevent this problem.
Can I use electrical tape instead of wire nuts for sensor connections?
While electrical tape can provide temporary insulation, it does not create as secure or reliable a connection as wire nuts. For best results, use wire nuts and add tape as an extra layer of protection if needed.
Why are my garage door sensor lights still blinking after fixing the wires?
If the lights continue to blink, the sensors may be misaligned or there could be another wiring issue further up the line. Double-check your connections, ensure the sensors are facing each other, and consult your opener’s manual for additional troubleshooting steps.
How often should I check my garage door sensor wiring?
It’s a good idea to inspect your sensor wiring at least once a year, or whenever you notice unusual behavior from your garage door. Regular checks can catch small issues before they become major problems.
Conclusion
Addressing problems with garage door sensor wire nuts and connections is a straightforward task for most homeowners. By following the steps outlined above, you can restore safe operation and avoid unnecessary service calls. Remember to use quality materials, protect your connections, and consult a professional if you encounter more serious electrical issues. With a little attention to detail, your garage door sensors will continue to provide reliable protection for your home.