Garage door sensors are essential for safety and smooth operation. When these sensors malfunction, your overhead door may refuse to close, reverse unexpectedly, or display blinking lights. Knowing how to troubleshoot overhead door sensors can help you quickly resolve common issues and restore your garage door’s reliability.
This guide covers practical steps to identify and fix sensor problems, from simple cleaning to alignment and wiring checks. Whether you’re a homeowner or a DIY enthusiast, you’ll find actionable advice to get your garage door working again. For more specific sensor mounting challenges, you might also find the article on how to fix garage door sensor mounting on metal studs helpful.
Understanding Garage Door Sensor Basics
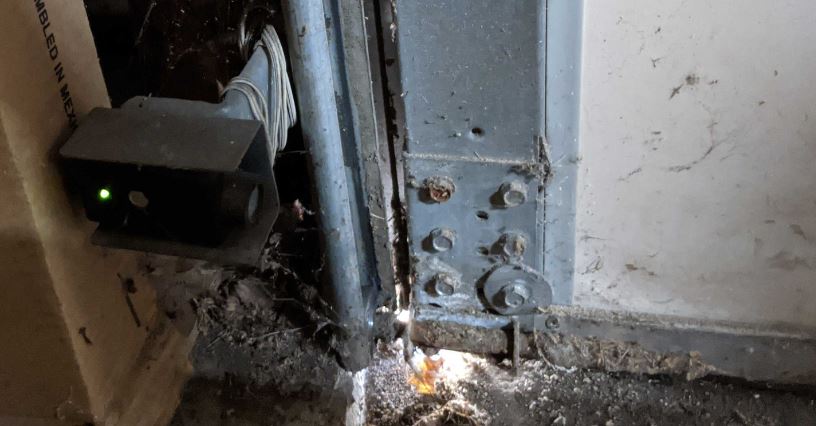
Most modern overhead doors use a pair of photoelectric sensors, often called “photo eyes,” mounted near the bottom of the door tracks. These sensors create an invisible beam across the opening. If the beam is interrupted, the door will not close, preventing accidents or damage.
Typical signs of sensor issues include:
- The garage door won’t close or reverses immediately after starting to close.
- Sensor indicator lights are off, blinking, or different colors.
- The opener makes beeping sounds or flashes error codes.
Understanding these symptoms is the first step in effective overhead door sensor troubleshooting.
Common Causes of Sensor Malfunctions
Several factors can cause your garage door sensors to stop working correctly. The most frequent culprits are:
- Dirt or debris on the sensor lenses, blocking the beam.
- Misalignment of the sensors, so the beam doesn’t connect.
- Loose or damaged wiring between the sensors and the opener.
- Obstructions in the sensor path, such as tools, toys, or even spider webs.
- Sunlight interference or moisture causing false signals.
Identifying the root cause is crucial for a quick fix. For issues related to sensor wiring, see this guide on how to fix garage door sensor wiring using electrical tape.
Step-by-Step: How to Troubleshoot Overhead Door Sensors
Follow these steps to diagnose and resolve most sensor problems:
-
Check for Obstructions
Inspect the area between the sensors for any objects, dirt, or cobwebs. Remove anything blocking the beam. -
Clean the Sensor Lenses
Gently wipe both sensor lenses with a soft, dry cloth. Even a thin layer of dust can disrupt the signal. -
Verify Sensor Alignment
Both sensors should face each other directly. Most sensors have indicator lights—if one or both are off or blinking, adjust the sensors until the lights are steady. -
Inspect the Wiring
Examine the wires leading to each sensor for signs of damage, loose connections, or corrosion. If you find issues, repair or replace the wiring as needed. For more on this, refer to the article on sensor wiring fixes. -
Test the Door Operation
After cleaning and realigning, operate the door. If it closes smoothly, the issue is resolved. If not, continue troubleshooting. -
Check for Sunlight or Moisture Issues
Direct sunlight or water on the sensors can cause malfunctions. Try shading the sensors or drying them off.
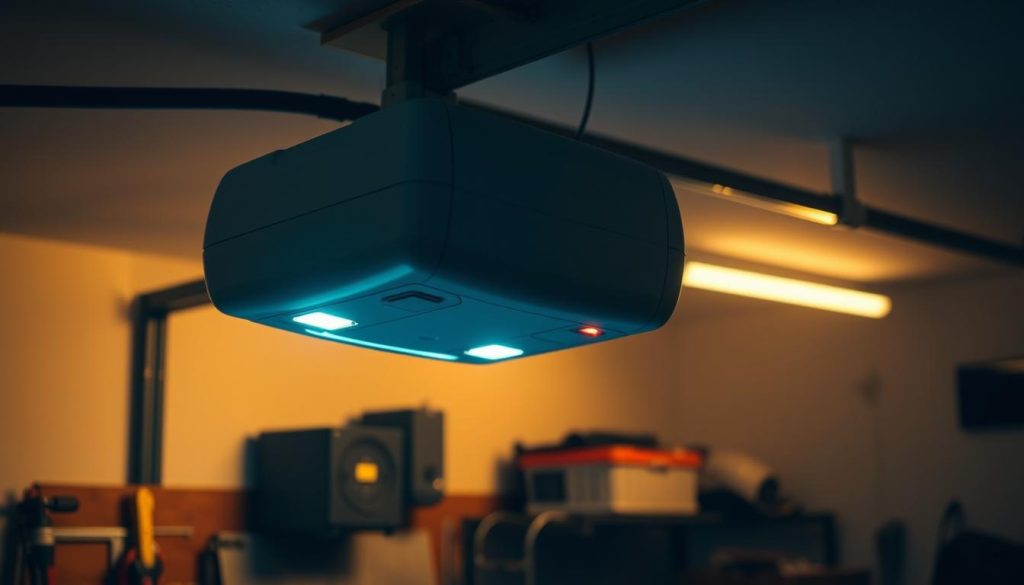
Sensor Indicator Lights: What Do They Mean?
Most garage door sensors feature small LED lights to signal their status. Here’s what different light patterns typically indicate:
| Light Pattern | Possible Meaning |
|---|---|
| Solid Green/Red | Sensors are aligned and working |
| Blinking | Misalignment or obstruction detected |
| Off | No power or wiring issue |
| Flashing Twice | Specific error code (see your opener’s manual or why is my garage door sensor light blinking twice) |
If your sensor lights don’t match these patterns, consult your opener’s manual or manufacturer’s website for detailed codes.
Advanced Troubleshooting Tips
If the basic steps above don’t solve the problem, try these additional checks:
- Swap the Sensors: If possible, switch the sensors to see if the problem follows one unit. This can help identify a faulty sensor.
- Check the Power Supply: Ensure the opener is plugged in and the circuit breaker hasn’t tripped.
- Inspect for Interference: Nearby electronics or LED lighting can sometimes interfere with sensor signals.
- Listen for Unusual Noises: A buzzing or humming sound may indicate electrical issues. For more, see how to fix garage door sensor hum or buzz.

When to Replace Your Garage Door Sensors
If you’ve tried all troubleshooting steps and your sensors still don’t work, replacement may be necessary. Signs you need new sensors include:
- Physical damage to the sensor housing or lens
- No indicator lights even after checking power and wiring
- Repeated malfunctions despite realignment and cleaning
Replacement sensors are widely available. Be sure to select a model compatible with your garage door opener. If your sensor transmitter appears dead, see this quick guide on dead sensor transmitters for more help.
Additional Resources for Sensor Troubleshooting
For more in-depth troubleshooting, you can reference this comprehensive guide to troubleshooting garage door sensors. It covers additional error codes, advanced fixes, and manufacturer-specific tips.
Frequently Asked Questions
What does it mean if my garage door sensor light is blinking?
A blinking sensor light usually indicates misalignment or an obstruction. Clean the lenses and realign the sensors until both indicator lights are steady. For specific blinking patterns, check your opener’s manual or see the guide on sensor light blinking twice.
Can I bypass garage door sensors temporarily?
While some openers allow you to hold the wall button to close the door, bypassing sensors is not recommended for regular use. Sensors are a critical safety feature. Always address the root cause of the problem rather than disabling them.
How do I know if my garage door sensor is bad?
If cleaning, realignment, and wiring checks don’t restore function, and the indicator lights remain off or the problem follows the sensor when swapped, it’s likely defective. In this case, replacing the sensor is the best solution.
Why does my garage door only close when I hold the wall button?
This is a safety override feature. It means the sensors are not detecting a clear path or are malfunctioning. Check for obstructions, clean the lenses, and realign the sensors to restore normal operation.
Conclusion
Learning how to troubleshoot overhead door sensors can save you time, money, and frustration. By following the steps in this guide—checking for obstructions, cleaning, realigning, and inspecting wiring—you can resolve most sensor problems yourself. If issues persist, consider replacing the sensors or consulting a professional. Regular maintenance will help keep your garage door system safe and reliable.