Garage door sensors are a critical safety feature, preventing the door from closing on people, pets, or objects in its path. When your garage door refuses to close or behaves unpredictably, a faulty sensor is often the culprit. Knowing how to tell which garage door sensor is broken can save you time, frustration, and unnecessary replacement costs. This guide will walk you through the most effective ways to diagnose sensor issues, interpret indicator lights, and determine whether you need a repair or replacement.
Before diving into troubleshooting, it’s important to understand that most modern garage doors use a pair of photoelectric sensors—one on each side of the door, near the floor. These sensors must be properly aligned and free of obstructions to function correctly. If you notice your garage door acting up, checking the sensors should be your first step.
For those dealing with colored indicator lights, such as yellow or blinking LEDs, you might find additional insights in resources like why is my garage door sensor yellow, which explains what different sensor light colors mean and how to address them.
Understanding Garage Door Sensor Functionality
Garage door safety sensors work by sending an invisible infrared beam between two units—one transmitter and one receiver. If the beam is interrupted, the door will not close, ensuring nothing is in its path. When troubleshooting sensor problems, it’s essential to know that both units must be powered, properly aligned, and free from dirt or debris.
The most common signs of sensor issues include:
- The garage door reverses immediately after touching the floor.
- The door won’t close at all, but opens without issue.
- Flashing or blinking sensor lights on one or both units.
- Indicator lights that are off, dim, or inconsistent.
Visual Inspection: Spotting a Faulty Sensor
The first step in identifying a malfunctioning sensor is a thorough visual check. Look for obvious signs of trouble, such as:
- Dirty or fogged sensor lenses.
- Physical damage to the sensor housing or wiring.
- Misalignment—sensors should face each other directly, with no obstacles in between.
If you spot dirt or cobwebs on the lenses, gently clean them with a soft cloth. Even a small amount of grime can disrupt the infrared beam. Next, ensure both sensors are mounted at the same height and are not loose or wobbly.
For more on dealing with obstructions, see what to do if garage door sensor is blocked, which covers common blockage issues and quick fixes.
Indicator Lights: Decoding Sensor Signals
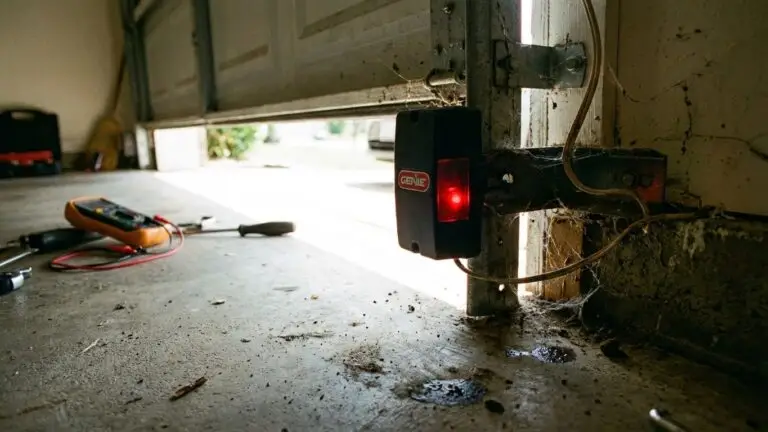
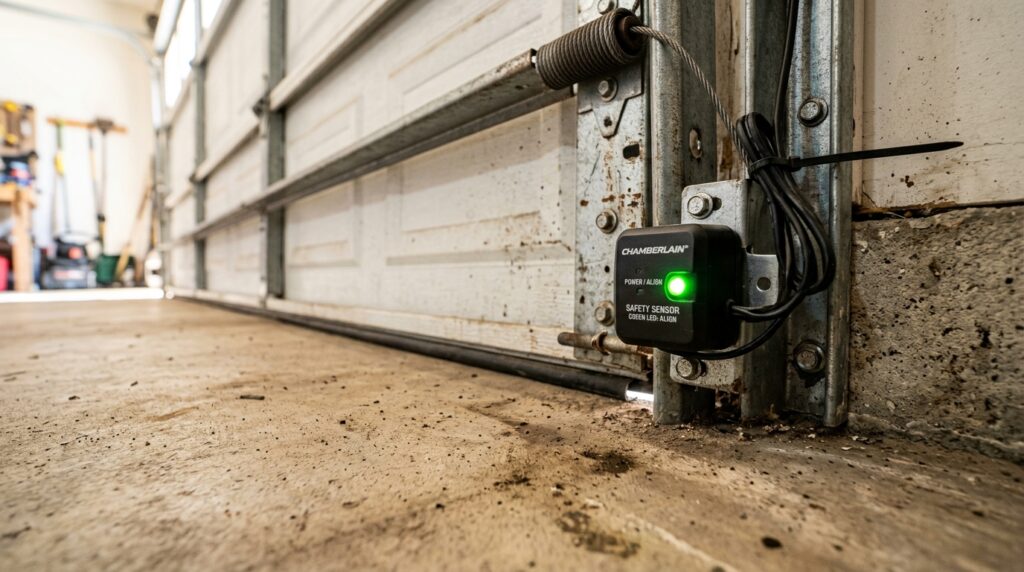
Most garage door sensors feature LED indicator lights that provide clues about their status. Understanding these signals is key to determining which garage door sensor is malfunctioning:
- Solid green or red light: Indicates the sensor is powered and aligned.
- Blinking or flashing light: Suggests misalignment, obstruction, or a wiring problem.
- No light: Points to a power issue, damaged wiring, or a dead sensor.
To pinpoint the faulty unit, observe both sensors while operating the door. If one light is steady and the other is off or blinking, the problematic sensor is usually the one with the abnormal light.
Step-by-Step Troubleshooting to Identify the Problematic Sensor
If visual checks and indicator lights are inconclusive, follow these steps to isolate the faulty sensor:
- Check power: Ensure both sensors have power. If one light is off, inspect the wiring and connections.
- Test alignment: Gently adjust each sensor until the indicator lights turn solid. If only one responds, the other may be defective.
- Swap sensors (if possible): On some models, you can swap the sensors’ positions. If the problem follows the sensor, it’s likely defective.
- Bypass test: Temporarily connect the two sensor wires together at the opener (for diagnostic purposes only). If the door closes, a sensor is bad.
- Check for wiring damage: Inspect wires for cuts, corrosion, or loose connections. For detailed repair steps, see how to replace garage door sensor wiring.
Common Causes of Sensor Failure
Several factors can lead to sensor malfunction. Understanding these causes can help prevent future issues:
- Misalignment: Vibration, accidental bumps, or settling can knock sensors out of alignment.
- Dirt and debris: Dust or spider webs can block the beam, causing false errors.
- Wiring issues: Rodents, weather, or age can damage sensor wiring.
- Sunlight interference: Direct sunlight can sometimes disrupt the infrared beam.
- Component failure: Sensors may simply wear out over time and need replacement.
When to Replace or Repair Your Garage Door Sensors
If cleaning, realigning, and checking the wiring do not resolve the issue, sensor replacement may be necessary. Replacement is straightforward and often more cost-effective than ongoing troubleshooting. For persistent flickering lights, see how to fix garage door sensor flickering for additional tips.
Always use compatible sensors for your garage door opener model. If you’re unsure, consult your opener’s manual or contact a professional for advice.
Additional Troubleshooting Resources
For more in-depth guidance, you can refer to comprehensive troubleshooting advice for garage door sensors. These resources offer step-by-step instructions and cover less common issues that may affect your system.
If you are comfortable with DIY repairs, you may also want to explore how to rewire garage door sensors for a more technical approach to persistent sensor problems.
Frequently Asked Questions
How do I know if my garage door sensor is out of alignment or actually broken?
If the sensor light is blinking, try realigning the sensors so they face each other directly. If the light remains off or continues blinking after alignment and cleaning, the sensor may be defective or have a wiring issue.
Can I bypass a faulty garage door sensor temporarily?
Some openers allow temporary bypassing for troubleshooting, but this should only be done briefly and with caution. Bypassing the sensors removes a critical safety feature and should not be a permanent solution.
What should I do if both sensor lights are off?
If neither sensor shows a light, check for a power supply issue, blown fuse, or disconnected wiring. Inspect the wiring from the opener to the sensors and restore any loose or damaged connections.
How often should I clean or check my garage door sensors?
It’s a good idea to inspect and clean your sensors every few months or whenever you notice the door behaving unusually. Regular maintenance helps prevent most sensor-related problems.