Ryobi garage door sensors are essential for ensuring the safe and reliable operation of your garage door system. When these sensors malfunction, your garage door may refuse to close, reverse unexpectedly, or display confusing indicator lights. Understanding how to troubleshoot Ryobi garage door sensors can save you time, money, and frustration, whether you’re a homeowner or a DIY enthusiast.
This guide will walk you through a systematic approach to diagnosing and resolving common issues with Ryobi garage door sensors. We’ll cover visual inspections, cleaning, wiring checks, alignment, and interpreting sensor lights. You’ll also find practical tips, answers to frequently asked questions, and links to related resources for deeper troubleshooting.
If you encounter issues like blinking lights, persistent red or green indicators, or your garage door refusing to close, you may also want to review why is my garage door sensor light blinking twice for additional troubleshooting insights.
Understanding Ryobi Garage Door Sensor Basics
Before diving into troubleshooting, it’s helpful to understand how these sensors work. Ryobi garage door sensors typically use an infrared beam between two units mounted near the bottom of the door tracks. If the beam is interrupted or the sensors are misaligned, the door will not close for safety reasons. Common symptoms of problems include:
- Door reverses immediately after trying to close
- Sensor lights are off, blinking, or stuck on red
- Garage door opener flashes error codes
Knowing these basics will help you identify where things might be going wrong as you proceed with troubleshooting.
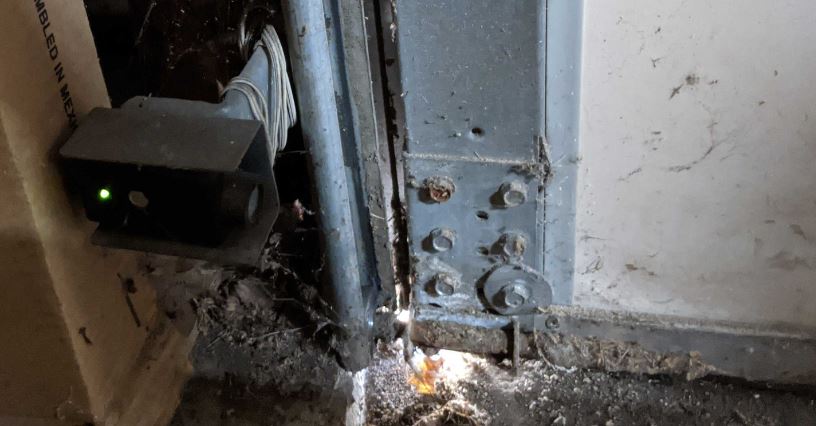
Step 1: Visual Inspection and Cleaning
Start by performing a thorough visual inspection of both sensors. Look for obvious signs of damage, dirt, or obstructions. Dust, cobwebs, or debris can easily block the infrared beam, causing the system to malfunction.
Use a soft, dry cloth to gently clean the sensor lenses. Avoid using harsh chemicals, as these can damage the plastic. After cleaning, check if the indicator lights on both sensors are steady and the door operates normally. If not, proceed to the next step.
Step 2: Checking Sensor Alignment
Misalignment is one of the most common causes of sensor issues. Both sensors must face each other directly, with their lenses parallel. Even a slight bump can knock them out of alignment.
- Loosen the mounting brackets slightly.
- Adjust each sensor until the indicator lights turn solid (usually green or red, depending on model).
- Tighten the brackets while keeping the sensors aligned.
If the lights remain off or blinking after alignment, continue with further diagnostics.
For more complex mounting scenarios, such as installation on metal studs, see how to fix garage door sensor mounting on metal studs for specialized tips.
Step 3: Inspecting Sensor Wiring and Connections
Wiring problems can prevent your Ryobi sensors from functioning correctly. Inspect the wires leading to each sensor for visible damage, loose connections, or corrosion. Common issues include:
- Frayed or chewed wires (often caused by rodents)
- Loose wire nuts or connectors
- Corrosion at the terminal points
If you find any damaged wires, repair or replace them as needed. For minor insulation issues, you can learn more about how to fix garage door sensor wiring using electrical tape to ensure a safe and effective repair.
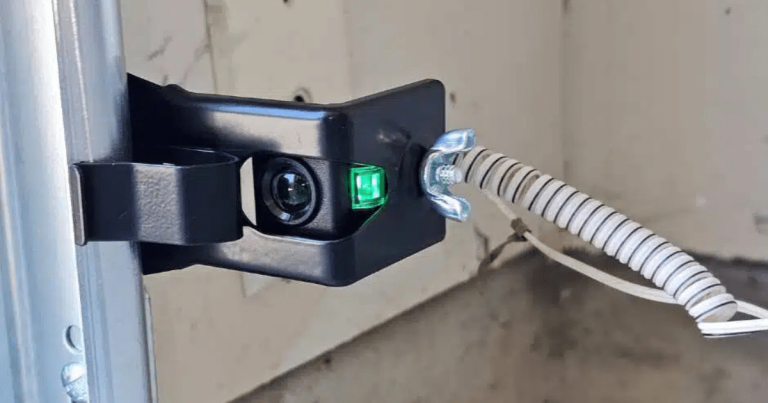
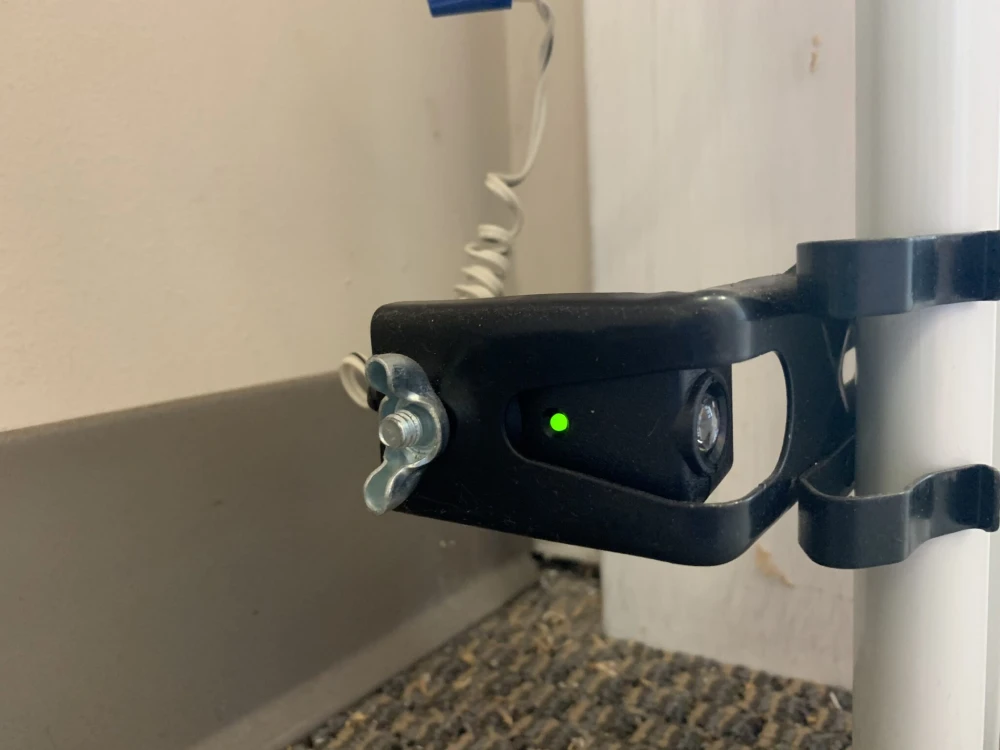
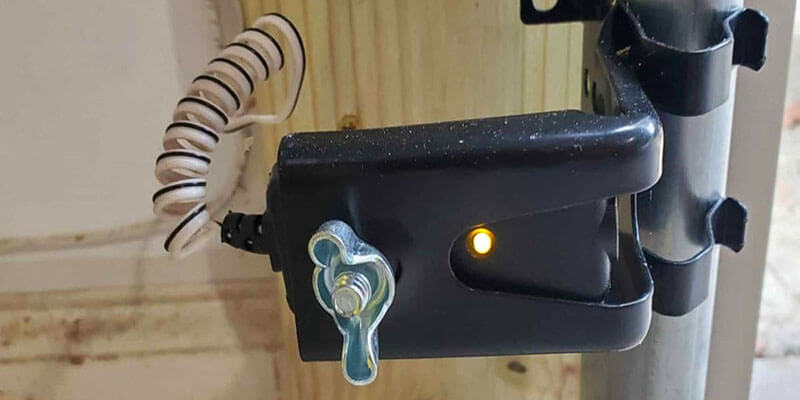
Step 4: Interpreting Sensor Indicator Lights
The indicator lights on Ryobi sensors provide valuable clues. Here’s a quick reference:
| Light Status | Meaning | Action |
|---|---|---|
| Solid Green/Red | Normal operation | No action needed |
| Blinking | Misalignment or obstruction | Realign and clear debris |
| Off | No power or wiring issue | Check connections and power |
For a deeper dive into what different sensor colors mean and how to address them, check out this comprehensive guide to garage door sensor colors and fixes.
Step 5: Testing the Garage Door System
After performing the above steps, test your garage door:
- Ensure the area around the sensors is clear.
- Operate the door using the wall button or remote.
- Observe the door’s movement and the sensor lights.
If the door closes smoothly and the lights remain steady, the issue is resolved. If problems persist, further troubleshooting or sensor replacement may be necessary.

Advanced Troubleshooting Tips
If your Ryobi sensors still aren’t working after the above steps, consider these advanced checks:
- Test the sensors by swapping their positions. If the problem follows the sensor, the unit may be faulty.
- Check for electrical interference from nearby devices or LED lighting.
- Listen for unusual noises from the sensors, such as buzzing or humming. For more on this, see how to fix garage door sensor hum or buzz.
- Inspect the garage door opener for error codes or flashing lights that may indicate a deeper issue.
If none of these steps resolve the problem, the sensor or the opener’s logic board may need replacement. In some cases, a dead transmitter could be the culprit; learn more in why is my garage door sensor transmitter dead.
Preventive Maintenance for Ryobi Sensors
Regular maintenance can help prevent most sensor issues. Here are a few tips:
- Clean sensor lenses monthly to avoid dust buildup.
- Check alignment after any impact or if the door is bumped.
- Inspect wiring annually, especially if you notice intermittent problems.
- Replace sensor lights promptly if they appear dim or flicker.
By keeping up with these simple tasks, you can ensure your garage door operates safely and reliably year-round.
Frequently Asked Questions
Why do my Ryobi garage door sensors keep blinking?
Blinking lights typically indicate misalignment or an obstruction between the sensors. Clean the lenses and realign the units until the lights remain steady. Persistent blinking may also signal wiring issues or sensor failure.
Can I bypass my Ryobi garage door sensors?
Bypassing safety sensors is not recommended, as it disables a critical safety feature. If you must temporarily override the sensors, consult your owner’s manual and restore them as soon as possible. Permanent bypassing can void warranties and create safety hazards.
What does it mean if both sensor lights are off?
If both lights are off, there is likely a power or wiring problem. Check the power supply to the opener, inspect all wiring connections, and look for signs of damage. If power is present but the lights remain off, the sensors may need replacement.
Conclusion
Addressing issues with Ryobi garage door sensors involves a step-by-step approach: inspect and clean the sensors, check alignment, verify wiring, and interpret indicator lights. With regular maintenance and prompt troubleshooting, you can keep your garage door system running safely and smoothly. For more in-depth information on sensor issues, explore the linked resources throughout this article.