Garage door sensors play a critical role in keeping your home safe by preventing the door from closing on people, pets, or objects. When your garage door stops working properly, faulty sensors are a common culprit. Knowing how to use a multimeter to test garage door sensors can help you diagnose issues quickly and avoid unnecessary repairs or replacements. This guide will walk you through the process step by step, ensuring you work safely and efficiently.
Before diving into the testing process, it’s helpful to understand how these safety devices work. Garage door sensors typically use an infrared beam between two units—one sender and one receiver. If the beam is interrupted, the door won’t close. Over time, wiring problems, misalignment, or sensor failure can cause malfunctions.
If you’re dealing with mounting issues, you may find additional tips in how to fix garage door sensor mounting on metal studs, which covers unique installation challenges.
Understanding Garage Door Sensor Problems
Before using a multimeter, it’s important to recognize the signs of sensor trouble. Common symptoms include:
- The garage door reverses unexpectedly or won’t close.
- Sensor indicator lights are off, blinking, or show inconsistent behavior.
- The door operates only when you hold the wall button down.
Sometimes, the issue is as simple as dirty lenses or misalignment. However, if cleaning and realigning the sensors don’t resolve the problem, electrical testing is the next logical step.
For those experiencing blinking lights, you can learn more about the causes and solutions by visiting this guide to troubleshooting blinking garage door sensor lights.
What You Need to Test Garage Door Sensors
To safely check your sensors, gather the following tools and materials:
- A digital or analog multimeter (with continuity and voltage settings)
- Protective gloves and safety glasses
- A screwdriver (if you need to access wiring)
- Paper towels or a soft cloth (for cleaning lenses)
Make sure your multimeter is functioning and the batteries are fresh. If you’re unfamiliar with using a multimeter, take a moment to review its manual before proceeding.

Safety Precautions Before Testing
Testing electrical components always carries some risk. To protect yourself and your equipment:
- Unplug the garage door opener or turn off the circuit breaker before handling wires.
- Wear safety glasses and gloves to prevent accidental shocks or injuries.
- Keep the area dry and well-lit.
- Never touch bare wires with your hands or metal tools while the power is on.
Following these precautions will help ensure a safe and successful testing process.
Step-by-Step Guide: Using a Multimeter on Garage Door Sensors
Let’s walk through the process of checking your sensors with a multimeter. These steps apply to most standard garage door safety sensors:
1. Inspect and Clean the Sensors
Before electrical testing, visually inspect the sensors for dirt, cobwebs, or physical damage. Clean the lenses gently with a soft cloth. Confirm that both sensors are aligned and their indicator lights are on. If lights are off or blinking, proceed to electrical testing.
2. Access the Sensor Wiring
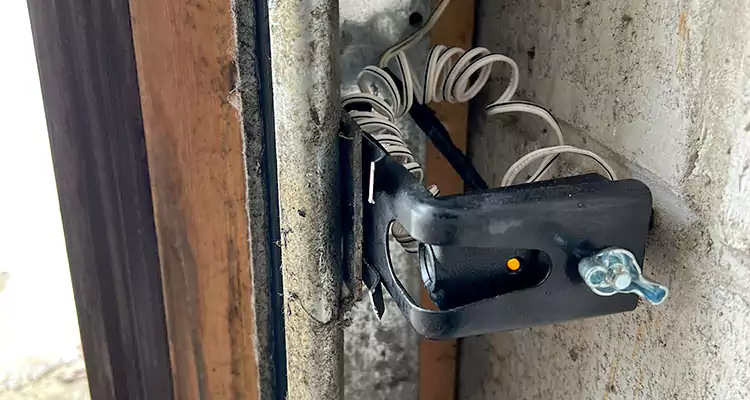
Locate the wires running from the sensors to the garage door opener. You may need a screwdriver to remove the sensor from its bracket or to access the terminal connections. Identify the two wires: typically, one is for power (often white) and the other for signal (often black or colored).
3. Set the Multimeter for Continuity or Resistance
With the power still off, set your multimeter to the continuity or resistance (ohms) setting. Touch the probes to the two sensor terminals or the ends of the disconnected sensor wires. A functioning sensor should show continuity (a beep or low resistance reading). If the multimeter shows infinite resistance or no continuity, the sensor may be faulty.
4. Check Voltage Supply
Restore power to the opener. Set the multimeter to DC voltage. Carefully touch the probes to the power and ground wires at the sensor. Most sensors operate at 5V to 24V DC. If you don’t detect voltage, the issue could be with the wiring or the opener’s control board.
5. Test the Signal Wire
Some multimeters can check for voltage fluctuations on the signal wire when the infrared beam is interrupted. With the door opener powered and the sensors aligned, measure the voltage at the signal terminal. Then, block the beam and observe any change. No change may indicate a failed sensor or wiring problem.
For more on sensor wiring repairs, see how to fix garage door sensor wiring using electrical tape for practical solutions.
Interpreting Your Multimeter Results
After testing, compare your readings to the manufacturer’s specifications. Here’s how to interpret common results:
- Continuity present: The sensor’s internal circuit is intact.
- No continuity: The sensor is likely defective and needs replacement.
- Correct voltage detected: Power is reaching the sensor.
- No voltage: There may be a wiring break or opener issue.
- No signal change: The sensor is not responding to beam interruptions and may be faulty.
If your sensors pass all tests but the door still malfunctions, the problem could be elsewhere in the opener system. For transmitter issues, review why is my garage door sensor transmitter dead for further troubleshooting.
When to Replace or Repair Garage Door Sensors
If your multimeter tests reveal a failed sensor or broken wiring, replacement is usually straightforward. Purchase a compatible sensor kit and follow the manufacturer’s instructions. For minor wiring issues, electrical tape or wire nuts can provide a temporary fix until a permanent repair is made.
Persistent problems, such as buzzing or humming noises, may indicate deeper electrical faults. For guidance on these issues, see how to fix garage door sensor hum or buzz for expert advice.
Maintenance Tips for Reliable Sensor Performance
Regular maintenance can help prevent future sensor malfunctions. Here are a few tips:
- Clean sensor lenses monthly to remove dust and debris.
- Check alignment after storms or accidental bumps.
- Inspect wiring for signs of wear, corrosion, or rodent damage.
- Test sensor operation periodically using the garage door opener controls.
Staying proactive with these steps will keep your garage door system running smoothly and safely.
Frequently Asked Questions
Can I test garage door sensors without a multimeter?
While visual inspection and cleaning can resolve some issues, a multimeter is the most reliable tool for diagnosing electrical faults. Without it, you may not detect wiring or internal sensor failures.
What voltage should I expect at the sensor terminals?
Most garage door sensors operate between 5V and 24V DC. Refer to your opener’s manual for the exact voltage. If you measure significantly less, check for wiring problems or a faulty control board.
Why does my garage door sensor light keep blinking?
Blinking lights often indicate misalignment, obstruction, or electrical issues. For a detailed explanation, consult why is my garage door sensor light blinking twice for step-by-step troubleshooting.
Is it safe to bypass a faulty garage door sensor?
Bypassing safety sensors is not recommended, as it can lead to injury or property damage. Always repair or replace malfunctioning sensors to maintain safe operation.