


A properly functioning garage door relies on strong, well-installed cables. Whether you’re replacing worn-out wires or installing new ones, following a reliable garage door cable installation guide is crucial for safety and smooth operation. This article covers the essential steps, safety precautions, and best practices for setting up garage door cables, helping homeowners and DIYers avoid common mistakes and hazards.
Garage door cables are under significant tension and play a vital role in lifting and lowering the door. Incorrect installation can lead to malfunctions or even injuries. By understanding the process and using the right materials, you can ensure your garage door operates reliably for years. For those seeking more advanced technical advice, the garage door cable professional guide offers in-depth insights and specifications.
Understanding Garage Door Cables and Their Role
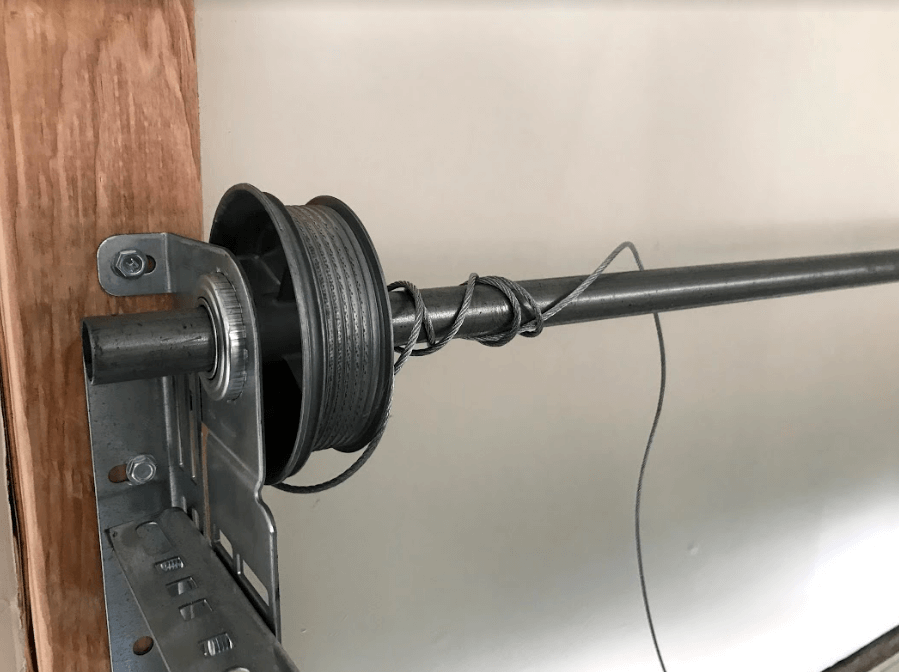
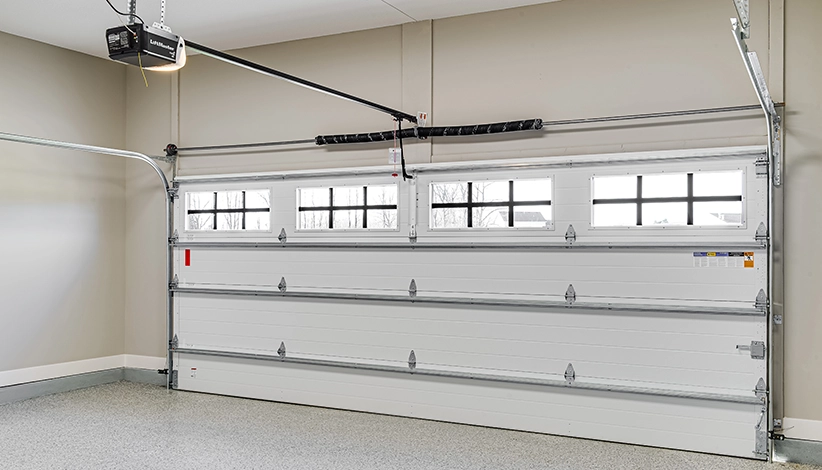
Garage door cables are heavy-duty wires that work with the springs to raise and lower the door. There are two main types: torsion spring cables and extension spring cables. Torsion cables wind around a drum as the door moves, while extension cables run alongside the horizontal tracks. Both types are critical for balanced movement and safety.
Over time, cables can fray, rust, or snap due to wear and tear or environmental factors. Regular inspections and timely replacement are essential. If you notice visible damage, uneven door movement, or hear unusual noises, it’s time to consider installing new cables.
For tips on preventing corrosion and extending cable life, see the garage door cable corrosion prevention resource.
Essential Safety Precautions Before Installation
Working with garage door cables involves high tension and potential hazards. Before starting, keep these safety measures in mind:
- Disconnect power to the automatic opener to prevent accidental activation.
- Release spring tension carefully, following manufacturer instructions. Never attempt to remove cables while springs are under load.
- Wear safety glasses and gloves to protect against sharp wires and sudden movements.
- Keep children and pets away from the work area.
- If unsure, consult a professional or refer to a comprehensive overview of garage door cable systems for further guidance.
For seasonal tips, the garage door cable seasonal maintenance article covers winter and summer care.
Tools and Materials Needed for Cable Setup
Before beginning, gather these tools and materials:
- Replacement garage door cables (matched to your door type and size)
- Winding bars (for torsion spring systems)
- Adjustable wrench and socket set
- Locking pliers or C-clamps
- Stepladder
- Safety gear (gloves, glasses)
- Lubricant (for pulleys and moving parts)
Using the correct tools ensures a smoother and safer installation. Always double-check cable specifications before purchase or installation.
Step-by-Step Garage Door Cable Replacement Process
Follow these steps for a safe and effective cable installation:
- Disconnect the opener and secure the door. Unplug the garage door opener. Use locking pliers or C-clamps on the tracks to hold the door in place.
- Release spring tension. For torsion systems, use winding bars to carefully unwind the springs. For extension systems, disconnect the safety cables and allow the springs to relax.
- Remove the old cables. Detach the cables from the bottom bracket and drum (torsion) or pulley (extension). Inspect pulleys and drums for wear.
- Install the new cables. Attach one end to the bottom bracket. For torsion systems, thread the cable over the drum and ensure it sits in the grooves. For extension systems, route the cable through the pulley and secure it.
- Reapply spring tension. Carefully wind the springs back to the correct tension, following manufacturer guidelines.
- Check alignment and test. Remove the clamps, reconnect the opener, and slowly open and close the door by hand. Listen for noises and ensure smooth movement.
If you encounter rust or moisture issues during installation, the garage door cable moisture damage guide provides solutions for rust and corrosion.
Common Mistakes and How to Avoid Them
Even experienced DIYers can make errors during cable installation. Here are some frequent mistakes and tips to prevent them:
- Using the wrong cable size: Always match cable thickness and length to your door’s specifications.
- Skipping safety steps: Never work on cables or springs without releasing tension and securing the door.
- Improper winding: For torsion systems, ensure cables are wound evenly and seated in the drum grooves.
- Neglecting lubrication: Lubricate pulleys and moving parts to reduce friction and wear.
- Ignoring environmental factors: In cold climates, review garage door cable winter issues to prevent problems during freezing temperatures.
Taking time to double-check each step can save you from costly repairs and safety hazards down the road.
Maintenance Tips After Cable Installation
Once your new cables are in place, regular maintenance will help extend their lifespan and keep your garage door operating smoothly:
- Inspect cables monthly for fraying, rust, or slack.
- Lubricate moving parts every six months with a silicone-based spray.
- Check cable tension and drum alignment, especially after extreme weather.
- Keep the garage environment dry to prevent corrosion.
For a deeper dive into ongoing care, the garage door cable corrosion prevention article offers advanced maintenance strategies.
Frequently Asked Questions
How do I know when my garage door cables need replacement?
Signs that cables need replacing include visible fraying, rust, kinks, or the door moving unevenly. If the door feels heavy or won’t stay open, inspect the cables immediately.
Can I install garage door cables myself, or should I hire a professional?
While many homeowners can handle basic cable replacement with the right tools and safety precautions, working with springs and cables involves risk. If you’re unsure or uncomfortable, it’s best to consult a professional or reference a detailed garage door cable installation guide.
What’s the difference between torsion and extension spring cables?
Torsion cables wind around a drum above the door and are used with torsion spring systems. Extension cables run along the sides of the door and are part of extension spring setups. Always use the correct type for your system.
Conclusion
Proper cable installation is essential for garage door safety and performance. By following the steps outlined in this guide, using the right tools, and prioritizing safety, you can confidently replace or install new cables. Regular inspections and maintenance will help prevent future issues and keep your garage door running smoothly.
For more technical advice and troubleshooting, explore resources like the garage door cable professional guide and related maintenance articles. Always prioritize safety and seek expert help if you encounter challenges during installation.
