Garage door sensors are essential for safe and reliable operation. When the sensor lens becomes scratched or scuffed, it can interfere with the infrared beam, causing your garage door to malfunction or refuse to close. Knowing how to fix garage door sensor lens scratches can save you time, money, and frustration. This guide covers practical steps to restore sensor clarity, maintain optimal performance, and prevent future issues.
Before you start, it’s important to understand that even minor blemishes on the lens can disrupt the sensor’s ability to detect obstructions. Addressing these imperfections promptly ensures your garage door system remains safe and efficient. If you’re dealing with other sensor issues, such as why is my garage door sensor indicator light missing, check out our related resources for more troubleshooting tips.

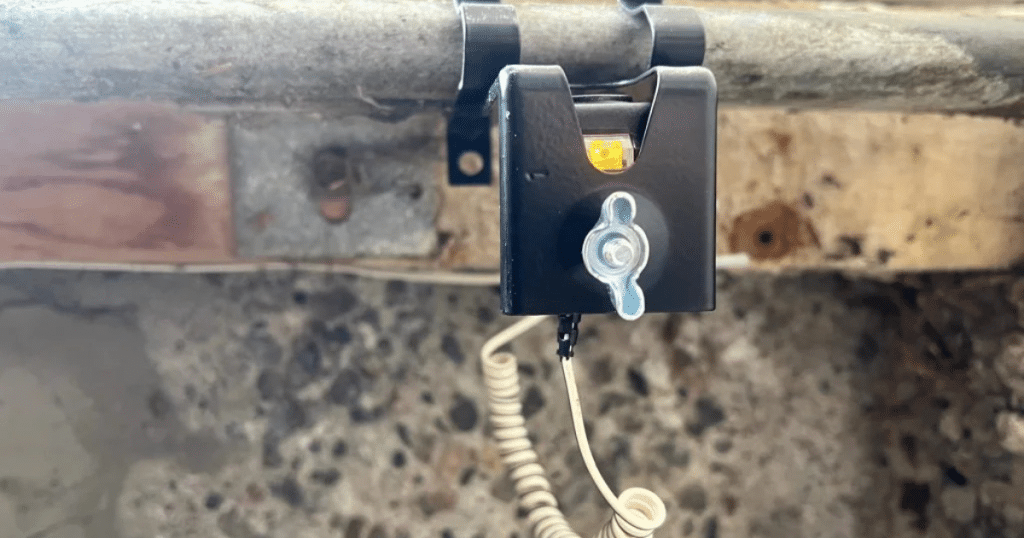
Understanding the Impact of Scratches on Sensor Lenses
Garage door sensors work by transmitting an invisible infrared beam between two units placed on either side of the door. When the lens is scratched or scuffed, the beam can become diffused or blocked, leading to false signals or a non-functioning door. In some cases, the door may reverse unexpectedly or refuse to close altogether. Regular inspection and maintenance of the sensor lens are crucial for preventing these problems.
Common causes of lens damage include accidental bumps, cleaning with abrasive materials, or exposure to dust and debris. If you notice your garage door behaving erratically, a quick visual check of the sensor lens can help you identify if scratches are the culprit. For more complex sensor mounting challenges, such as installation on metal studs, see our guide on how to fix garage door sensor mounting on metal studs.
Tools and Materials Needed for Lens Restoration
Before attempting to repair a scratched sensor lens, gather the following items:
- Microfiber cloth
- Mild soap and water
- Plastic polish or lens cleaner (suitable for optical plastics)
- Cotton swabs
- Optional: Toothpaste (non-gel, non-whitening for minor scratches)
- Compressed air (for dust removal)
Always avoid harsh chemicals or abrasive pads, as these can worsen the damage. Using the right products ensures you restore clarity without introducing new scratches.
Step-by-Step Process to Remove Scratches from Garage Door Sensor Lenses
Follow these steps to address scuffs and scratches on your garage door sensor lens:
-
Power Off the Garage Door Opener:
For safety, disconnect the power to your garage door opener before working on the sensors. This prevents accidental activation during cleaning or repair.
-
Clean the Lens Surface:
Use a microfiber cloth dampened with mild soapy water to gently wipe away dust and grime. Avoid excessive moisture. Dry the lens with a clean, dry cloth.
-
Assess the Damage:
Examine the lens under good lighting. Minor surface scratches can often be polished out, while deeper gouges may require more attention or lens replacement.
-
Polish Out Minor Scratches:
Apply a small amount of plastic polish or lens cleaner to a microfiber cloth. Rub the lens in a circular motion, applying gentle pressure. For very light scratches, a dab of non-gel toothpaste can be used as a mild abrasive. Wipe away any residue with a clean cloth.
-
Remove Residual Debris:
Use compressed air or a soft brush to clear away any remaining particles from the lens and sensor housing.
-
Test the Sensor:
Restore power and test the garage door operation. If the door still malfunctions, repeat the cleaning and polishing process or consider replacing the lens if damage is severe.
For a detailed guide on troubleshooting sensor faults, visit this step-by-step walkthrough for testing faulty garage door sensors.
When to Replace the Sensor Lens Instead of Repairing
While many scratches can be polished out, some damage may be too deep for effective repair. If you notice cracks, cloudiness that doesn’t clear up, or repeated sensor errors after cleaning, replacing the lens or the entire sensor unit may be necessary. Replacement lenses are often available from the manufacturer or online retailers. If the bracket or mounting hardware is also damaged, see our article on how to fix garage door sensor bracket bending for repair tips.

Preventing Future Scratches and Scuffs on Garage Door Sensors
Prevention is the best way to avoid recurring issues with your garage door sensor lens. Here are some practical tips:
- Clean the lens regularly using a microfiber cloth and gentle cleaner.
- Keep the area around the sensors free from clutter and debris.
- Teach family members to avoid bumping or touching the sensors.
- Inspect the sensor alignment and mounting hardware periodically, especially after extreme temperature changes. If you notice misalignment, refer to our resource on how to fix garage door sensor from shifting due to temperature.
- Consider installing protective covers if your garage is a high-traffic area.
By following these steps, you can extend the lifespan of your sensors and reduce the risk of operational problems.
Common Signs of Sensor Lens Problems
Recognizing the symptoms of a scratched or dirty sensor lens can help you address issues before they escalate. Watch for these warning signs:
- The garage door reverses immediately after touching the floor.
- Indicator lights on the sensors are blinking or not illuminated.
- The door refuses to close and the opener flashes an error code.
- Visible dirt, fogging, or scratches on the lens surface.
If you observe any of these problems, inspect the lens and follow the cleaning and repair steps outlined above. For issues with the sensor lights themselves, see our troubleshooting guide on why is my garage door sensor light turning off and on.
Frequently Asked Questions
Can I use regular glass cleaner on my garage door sensor lens?
It’s best to avoid standard glass cleaners, as they may contain chemicals that can damage plastic lenses. Use a cleaner specifically designed for optical plastics or a mild soap solution with a microfiber cloth.
What if polishing doesn’t remove the scratches?
If gentle polishing fails to restore clarity, the scratches may be too deep. In this case, replacing the lens or the entire sensor unit is the most effective solution for reliable operation.
How often should I clean my garage door sensor lens?
Inspect and clean the lens every few months, or more frequently if your garage is exposed to dust, dirt, or high traffic. Regular maintenance helps prevent buildup and reduces the risk of scratches.
Is it safe to use toothpaste to remove scratches?
Non-gel, non-whitening toothpaste can be used as a mild abrasive for very light scratches. Apply gently with a microfiber cloth, then wipe clean. Avoid using toothpaste on deep scratches or as a substitute for proper plastic polish.
Conclusion
Maintaining a clear, undamaged lens is essential for the safe and smooth operation of your garage door. By understanding how to fix garage door sensor lens scratches and following the steps outlined above, you can resolve most minor issues yourself. For persistent problems or severe damage, consider replacing the lens or consulting a professional. Regular care and preventive measures will help keep your garage door sensors functioning reliably for years to come.


