Garage door sensors are essential for safety, but when their brackets start to vibrate or make noise, it can lead to unreliable operation and annoying sounds. Understanding how to fix garage door sensor bracket vibration is crucial for homeowners who want smooth, quiet, and safe garage door performance. This guide covers the causes of sensor bracket vibration, practical troubleshooting steps, and proven solutions to stop the noise and restore proper function.
Before diving into repairs, it’s helpful to know that sensor brackets are often mounted near the bottom of the garage door tracks. Over time, they can become loose, bent, or misaligned, leading to unwanted movement and rattling. Addressing these issues promptly not only reduces noise but also ensures your garage door sensors work as intended—preventing accidental closure on people, pets, or objects.
If your garage door sensor is mounted on a metal stud or you notice the bracket is shifting due to temperature changes, you may want to review related solutions such as how to fix garage door sensor mounting on metal studs or how to fix garage door sensor from shifting due to temperature for more specialized guidance.
Common Causes of Sensor Bracket Vibration
Several factors can contribute to a vibrating or noisy sensor bracket. Identifying the root cause is the first step toward an effective fix. Here are the most frequent culprits:
- Loose mounting hardware: Over time, bolts and screws can loosen due to repeated door operation or vibrations from the opener.
- Bent or damaged brackets: Accidental bumps, impacts, or general wear can deform the bracket, making it less stable.
- Poor alignment: If the sensors are not properly aligned, the bracket may be under tension, causing it to vibrate when the door moves.
- Improper mounting surface: Attaching the bracket to thin metal or flexible material can amplify vibrations.
- Environmental factors: Temperature changes can cause expansion and contraction, leading to bracket movement or shifting.
Addressing these issues will help you achieve a quieter, more reliable garage door system.
Step-by-Step Guide to Stopping Sensor Bracket Noise
Follow these practical steps to resolve bracket vibration and noise. Each step is designed to be straightforward and safe for most DIYers.
1. Inspect the Bracket and Mounting Hardware
Start by visually examining the sensor bracket and its attachments. Look for any obvious signs of looseness, rust, or damage. Gently wiggle the bracket—if it moves easily, tightening is needed.
2. Tighten All Fasteners
Use a screwdriver or socket wrench to snug up all screws and bolts holding the bracket in place. Be careful not to overtighten, as this can strip threads or crack plastic parts. If the bracket is attached to drywall or a thin metal stud, consider using appropriate anchors or self-tapping screws for a more secure hold.
3. Check for Bracket Bending or Deformation
If the bracket appears bent or warped, it may need to be straightened or replaced. A bent bracket can cause persistent vibration and misalignment. For guidance on this issue, see how to fix garage door sensor bracket bending.
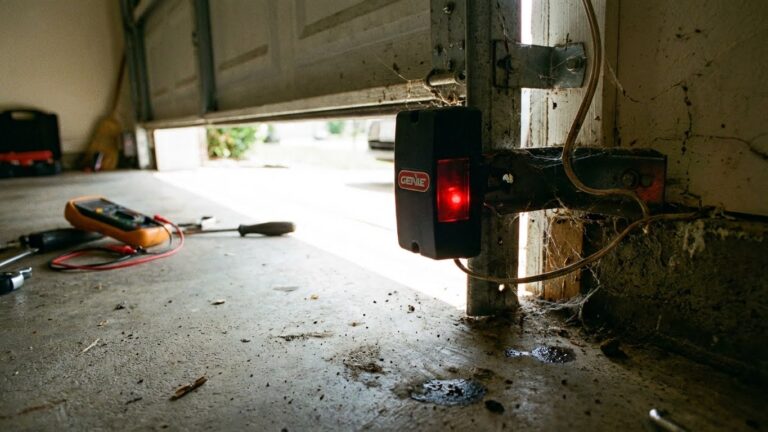
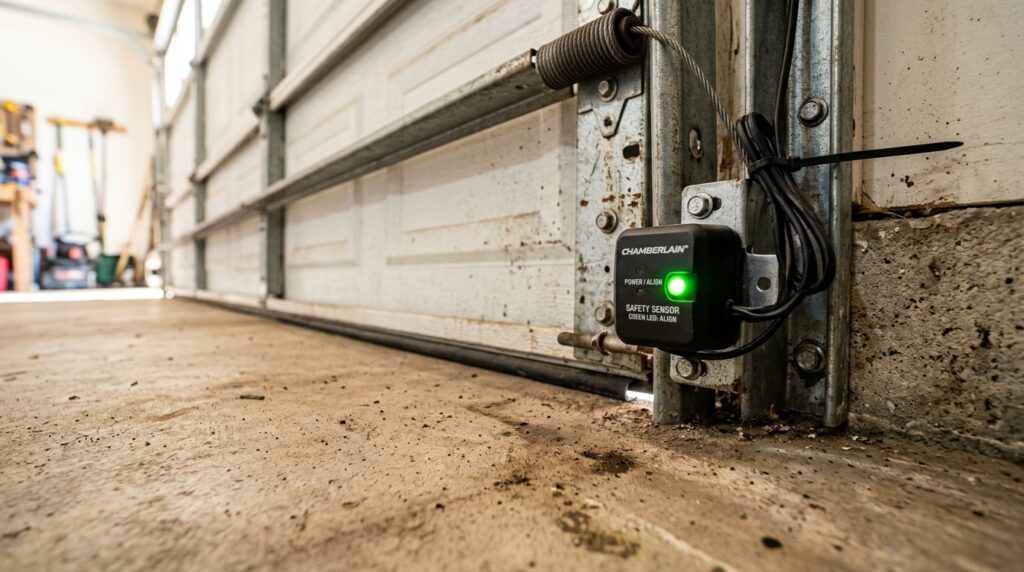
4. Realign the Sensors
Misaligned sensors can cause the bracket to vibrate as the door moves. Make sure both sensors are facing each other directly and that their indicator lights are solid (not blinking). Adjust the bracket as needed until alignment is perfect.
5. Add Vibration Dampening Material
For persistent vibration, try placing a thin piece of rubber, foam, or felt between the bracket and the mounting surface. This simple step can absorb much of the vibration and reduce noise. Make sure the added material does not interfere with sensor alignment.
6. Replace Worn or Damaged Parts
If tightening and realignment do not solve the issue, the bracket or sensor itself may be worn out. Replacement parts are widely available and often inexpensive. When installing new components, follow the manufacturer’s instructions for optimal performance.

Tips for Preventing Future Sensor Bracket Problems
Once you’ve resolved the vibration and noise, a few preventative measures can help keep your garage door sensors quiet and reliable:
- Regularly inspect and tighten hardware as part of your garage door maintenance routine.
- Keep the area around the sensors clear to avoid accidental bumps or impacts.
- Use quality mounting materials and avoid attaching brackets to unstable surfaces.
- Monitor sensor lights for signs of misalignment or malfunction. If the indicator light is missing, see why is my garage door sensor indicator light missing for troubleshooting.
- Address temperature-related shifting by using brackets designed to withstand expansion and contraction.
When to Call a Professional
Most sensor bracket issues can be fixed with basic tools and a little patience. However, if you notice persistent problems, electrical issues, or if the garage door fails to operate safely, it’s wise to consult a professional technician. They can diagnose complex issues, replace faulty wiring, and ensure your system meets all safety standards.
For more detailed troubleshooting steps, you can refer to this comprehensive guide to troubleshooting garage door sensor issues from a trusted industry source.
Frequently Asked Questions
Why does my garage door sensor bracket keep vibrating even after tightening?
If tightening the screws does not resolve the vibration, the bracket may be bent, the mounting surface may be unstable, or there could be ongoing misalignment. Consider adding vibration dampening material or replacing the bracket if it is damaged.
Can I use any type of screw or anchor to secure my sensor bracket?
It’s best to use hardware that matches your mounting surface. For wood, standard screws work well. For metal studs or drywall, use self-tapping screws or wall anchors designed for those materials. This ensures a secure and long-lasting installation.
How do I know if my garage door sensor is aligned correctly?
Most sensors have indicator lights—typically green or red. A solid light usually means proper alignment, while a blinking or off light indicates a problem. Consult your opener’s manual for specific light codes, and make small adjustments to the bracket until the light remains steady.
What should I do if my sensor bracket is bent or damaged?
If the bracket is visibly bent, it’s best to replace it. Continuing to use a damaged bracket can lead to ongoing vibration, misalignment, and unreliable sensor operation. Replacement brackets are inexpensive and easy to install with basic tools.
Is it safe to operate my garage door if the sensor bracket is vibrating?
While minor vibration may not immediately affect safety, persistent movement can lead to sensor misalignment and unreliable operation. It’s best to address the issue promptly to ensure your garage door’s safety features remain effective.
Conclusion
Addressing sensor bracket vibration and noise is a straightforward process that can make your garage door safer and quieter. By inspecting, tightening, realigning, and replacing components as needed, you’ll restore reliable sensor function and eliminate annoying rattles. For ongoing peace of mind, include sensor bracket checks in your regular maintenance routine, and don’t hesitate to seek professional help for complex issues.
For more on related garage door sensor problems, you may also find it useful to read about why is my garage door sensor light turning off and on and other troubleshooting tips available on our site.


